

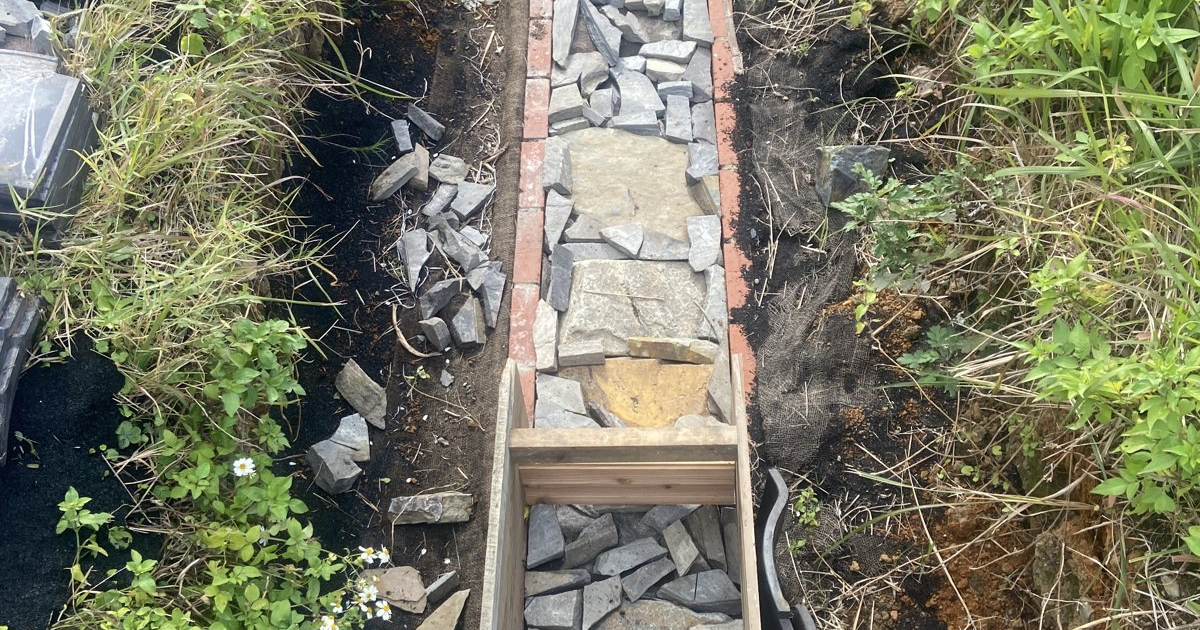
日本語版: 排水浄化システムの施工手順|掘削から炭・石・マルチングまで16か月の記録
Once a wastewater treatment system is finished, all you see is a few pipes and a layer of mulch. The layers underneath, and the order in which they were placed, are only visible during construction.
This article records, step by step, how EKAM built its own electricity-free wastewater treatment system on company land, from excavation in January 2025 to finishing in May 2026: about 16 months of site photos. We show how the anaerobic, aerobic and soil zones explained in part one take physical shape.
For each step we note the materials and why we chose them. We hope it is useful not only to people building something similar, but to anyone working with water and air below ground, from drainage improvement with charcoal and stone to rainwater infiltration.
Construction Overview
| Period | Work | Main materials |
|---|---|---|
| Jan 2025 | Setting out and trench excavation | Excavator, stakes, batter boards |
| Feb–Mar 2025 | Checking drainage; charcoal and gravel at the base | Charcoal, crushed stone |
| Apr–May 2025 | Leveling; floor and edging; side walls and pipes; charcoal backfill | Gravel, concrete, brick, boards, jute, charcoal |
| Dec 2025 | Round stones in the chamber; inspection box | River stones, concrete box |
| Jan 2026 | Split-stone cover, gravel layer, deep vertical holes | Split stone, corrugated edging, gravel, PVC pipe |
| Feb 2026 | Infiltration pit, perforated pipe, house connection | Rubble stone, charcoal, perforated pipe |
| Apr–May 2026 | Covering and mulching | Coir, jute, leaf litter, wood chips |
There is a gap between May and December 2025. You do not have to build it all at once; you can check each layer before moving on, which is one of the strengths of this method.
Steps 1–3: Excavation and the Base
Step 1. Set out and dig the trench (January 2025)
We set out the position and levels with stakes and batter boards, then dug the trench with a small excavator. The base level was worked back from the height and fall of the drain pipe so that wastewater flows in by gravity.
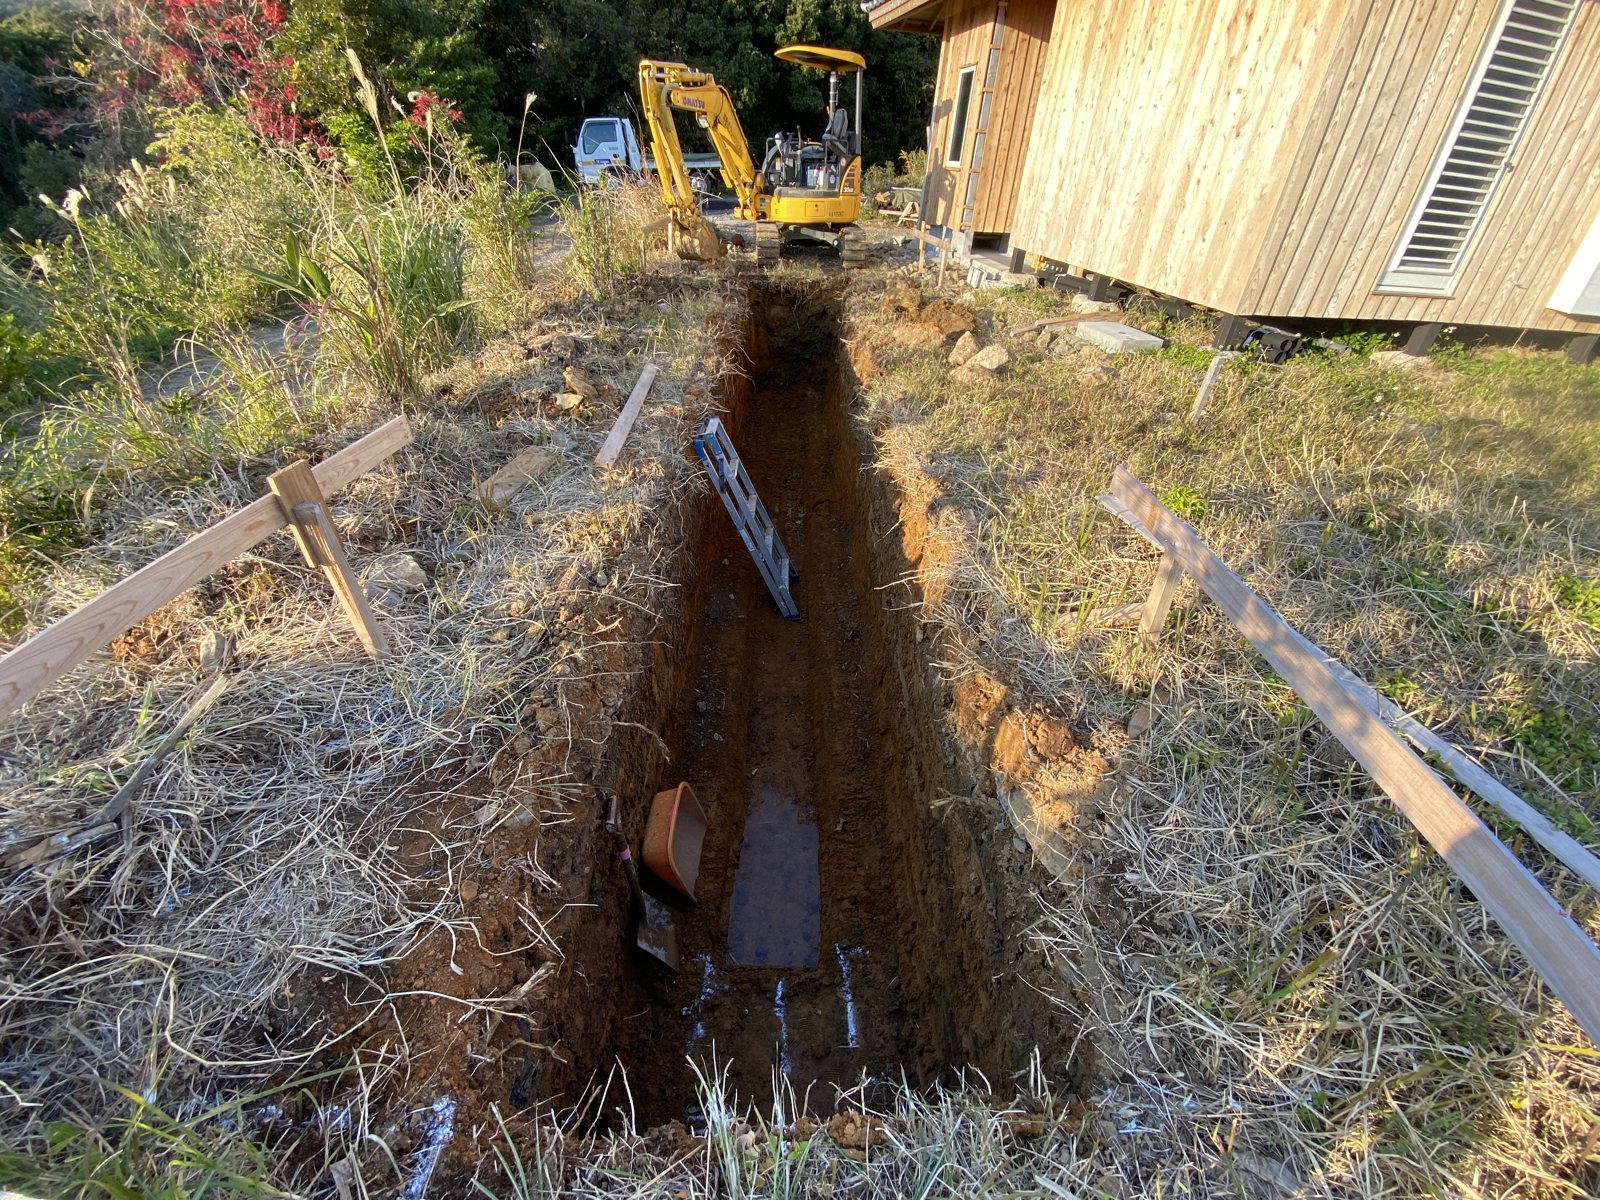
While digging, we read the color and hardness of the trench walls. Below the topsoil was red native soil mixed with rock.
Step 2. Watch how water soaks in (February 2025)
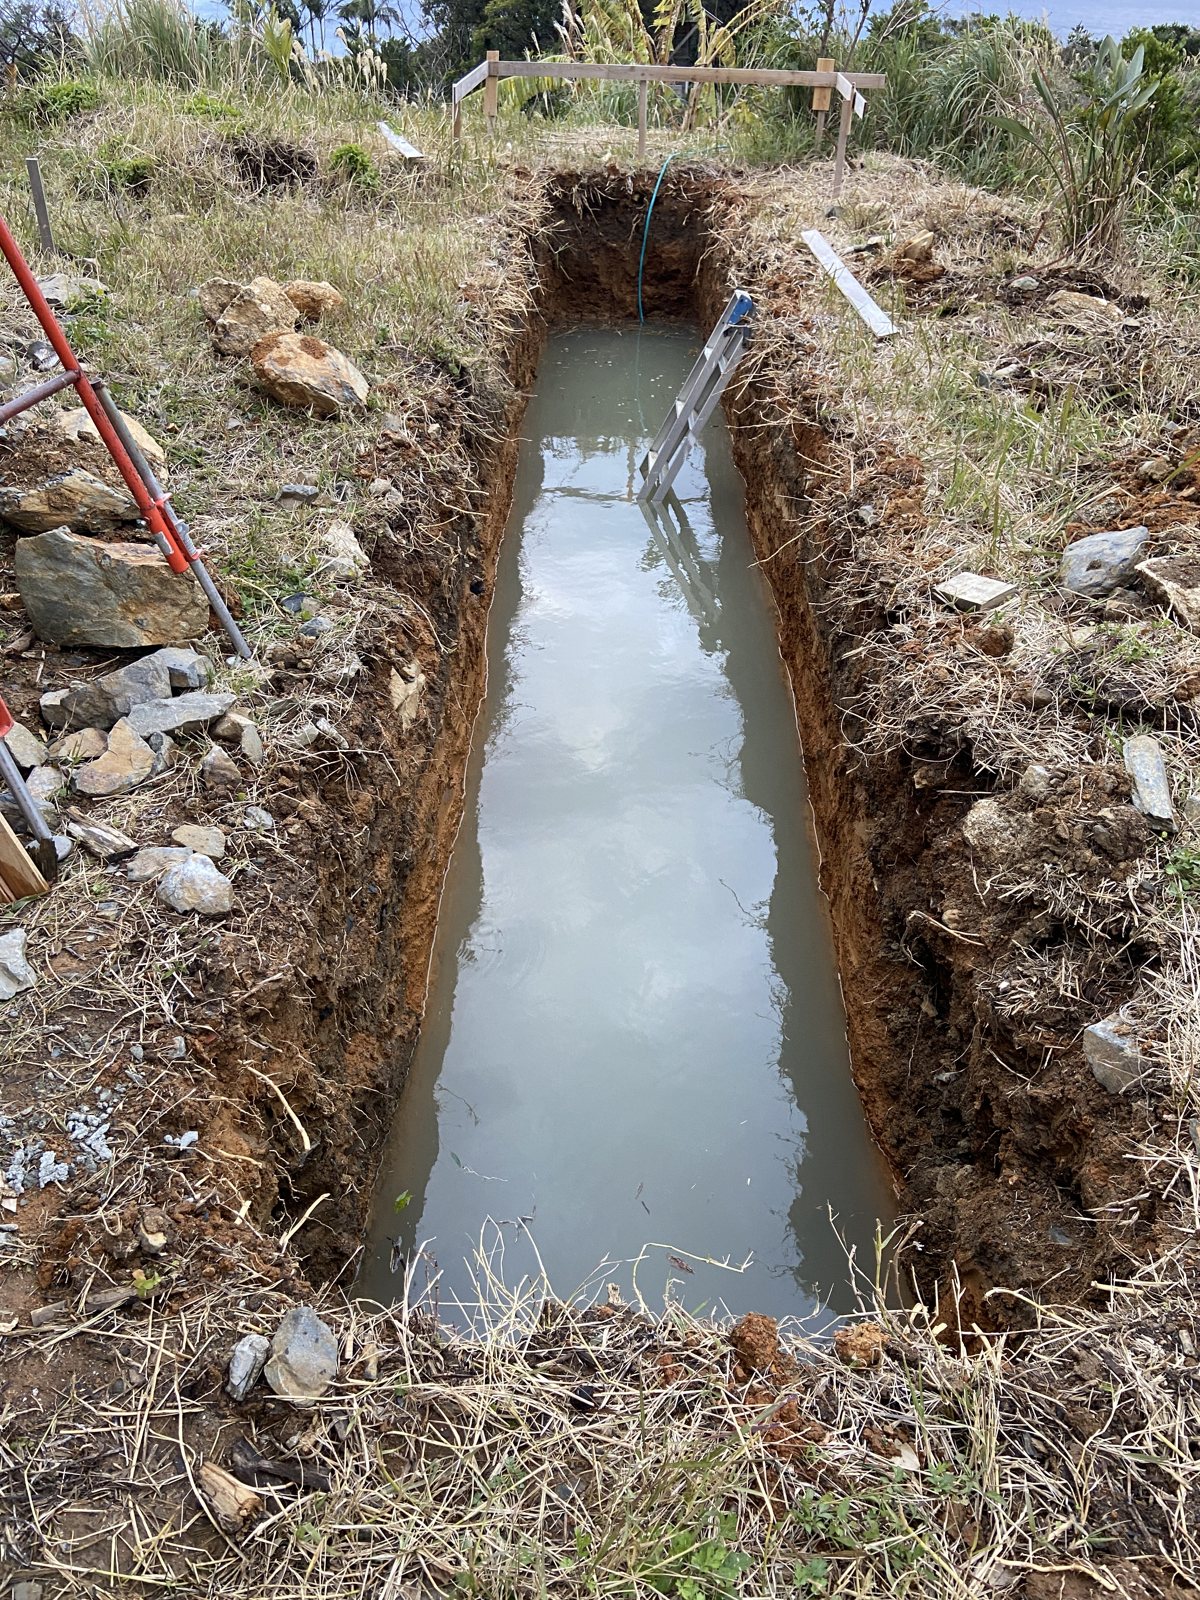
Water collected in the open trench and was slow to drain, telling us the clay-rich ground accepts water slowly. This confirmed our approach: deliberately build pathways for water and air at the base and around the structure.
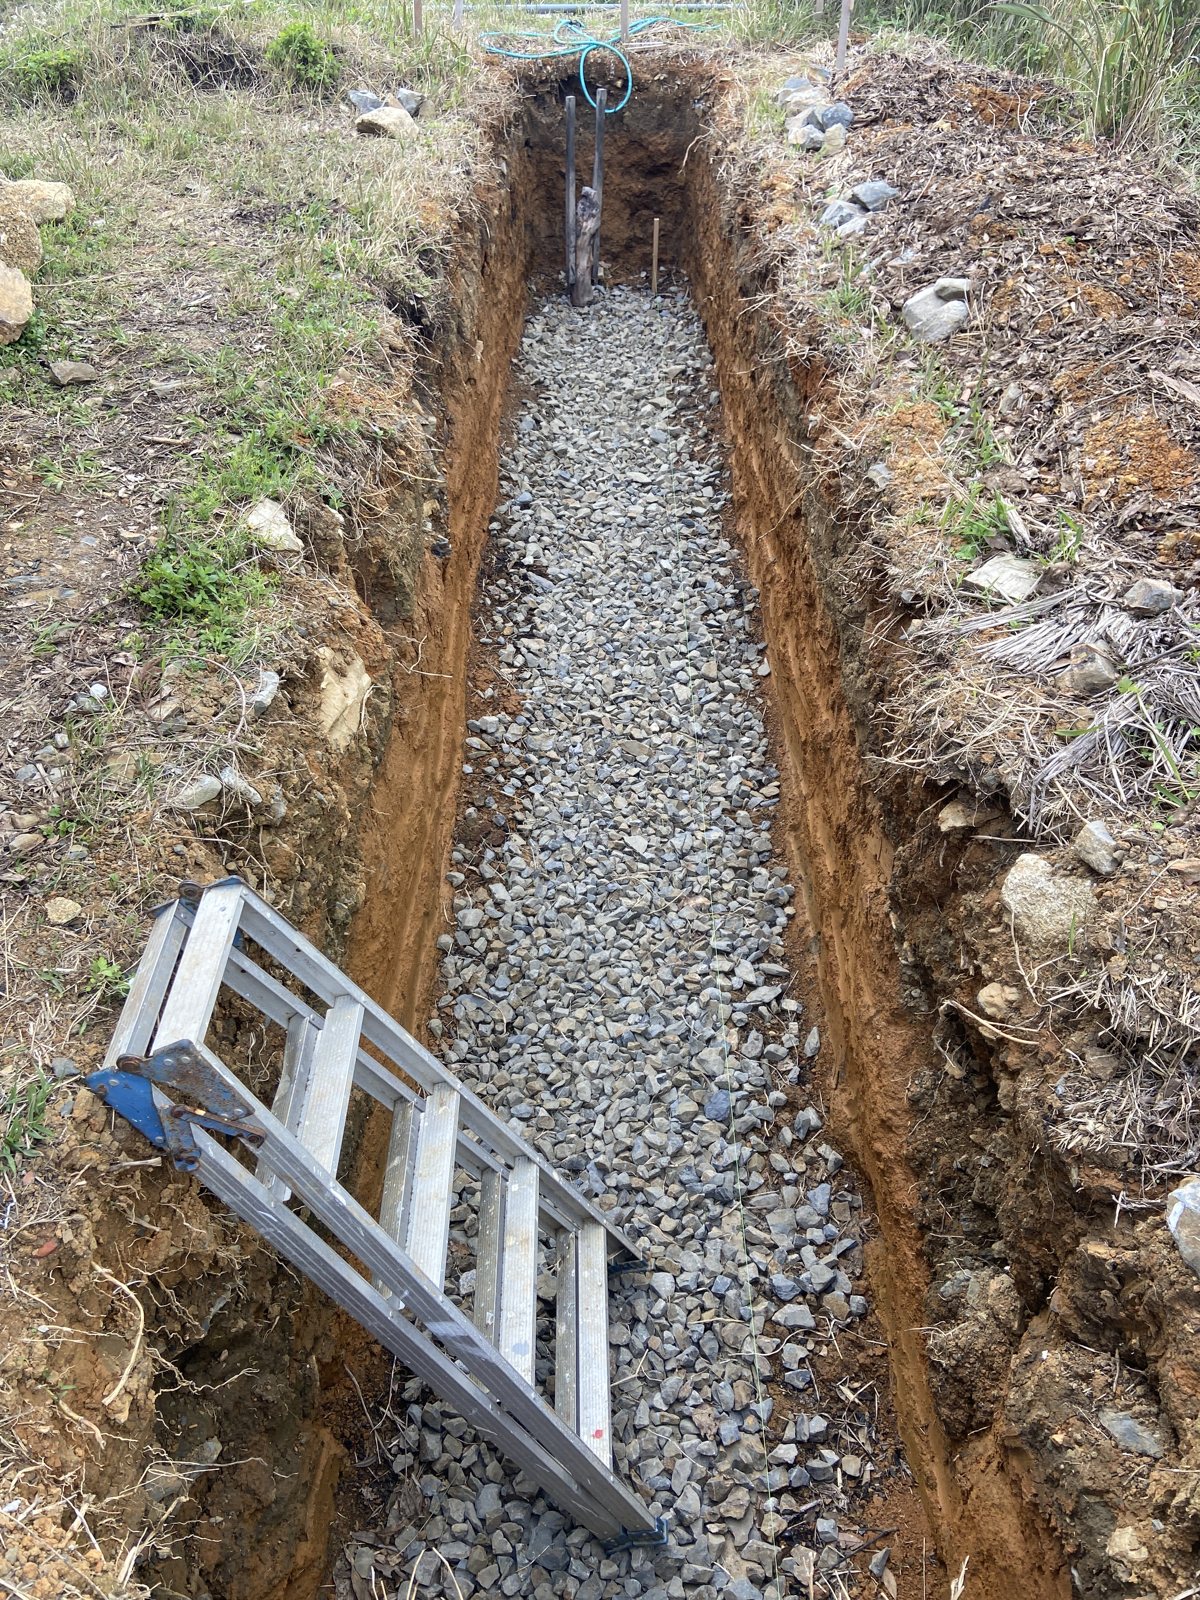
Step 3. Charcoal along the edges, gravel in the middle (March 2025)
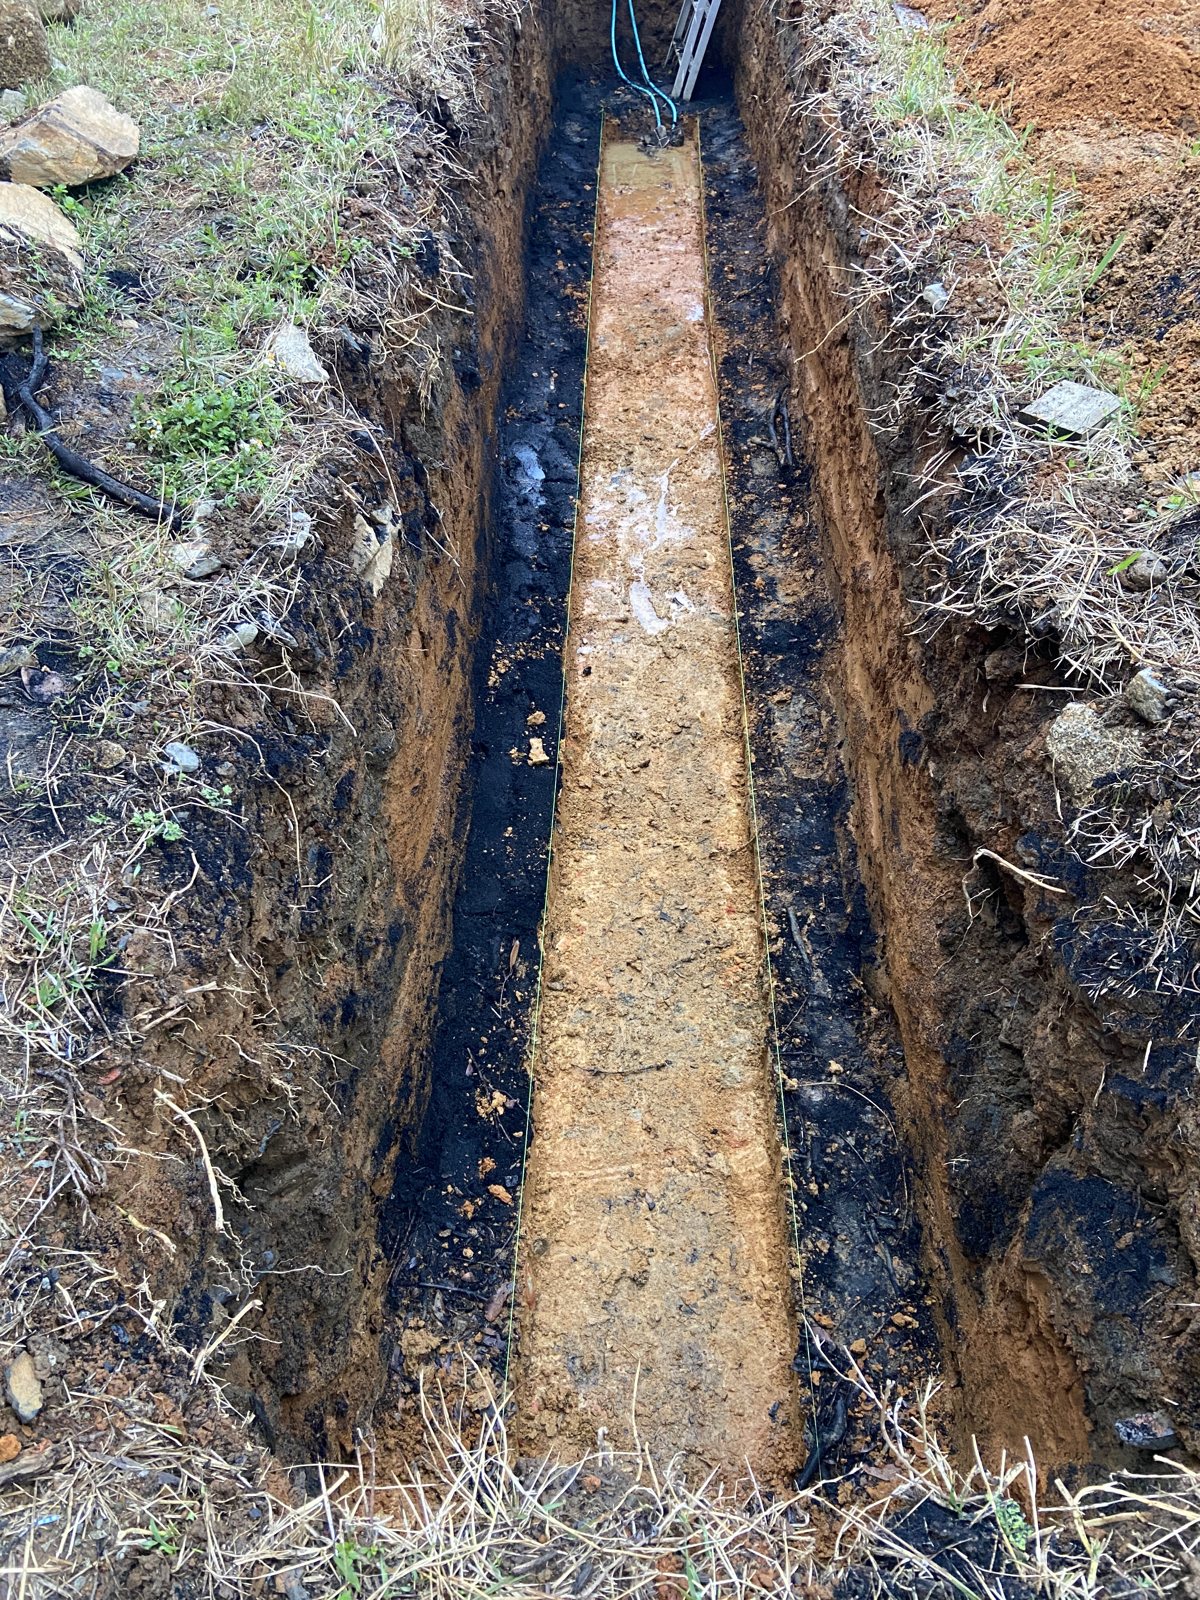
We laid charcoal along both edges of the trench floor, then spread crushed stone across the base. The charcoal bands leave an air layer at the boundary between native soil and the structure, while the gravel carries load and lets water escape.
Steps 4–6: Building the Chamber
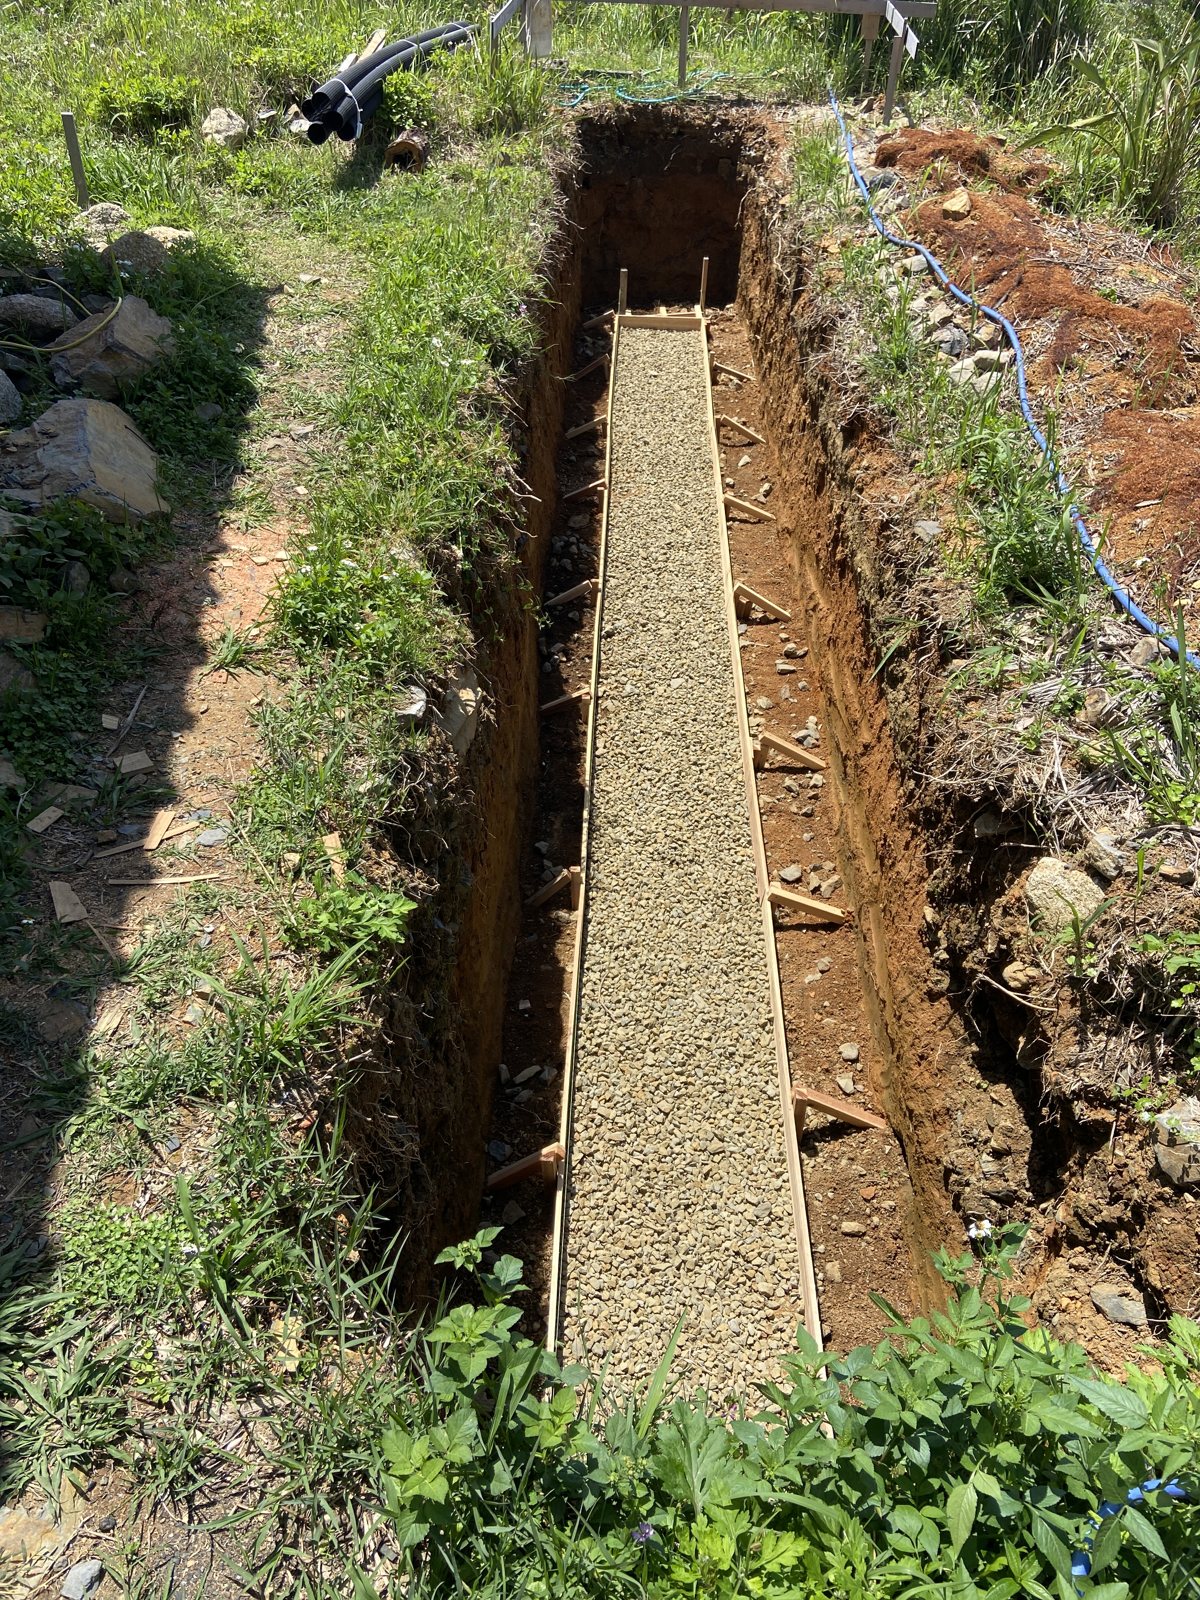
Step 4. Level the bed (April 2025)
We set formwork and spread fine gravel to a level bed. If the floor level varies, water collects on one side and part of the system is overloaded. Keeping a long run level is the basis for even performance.
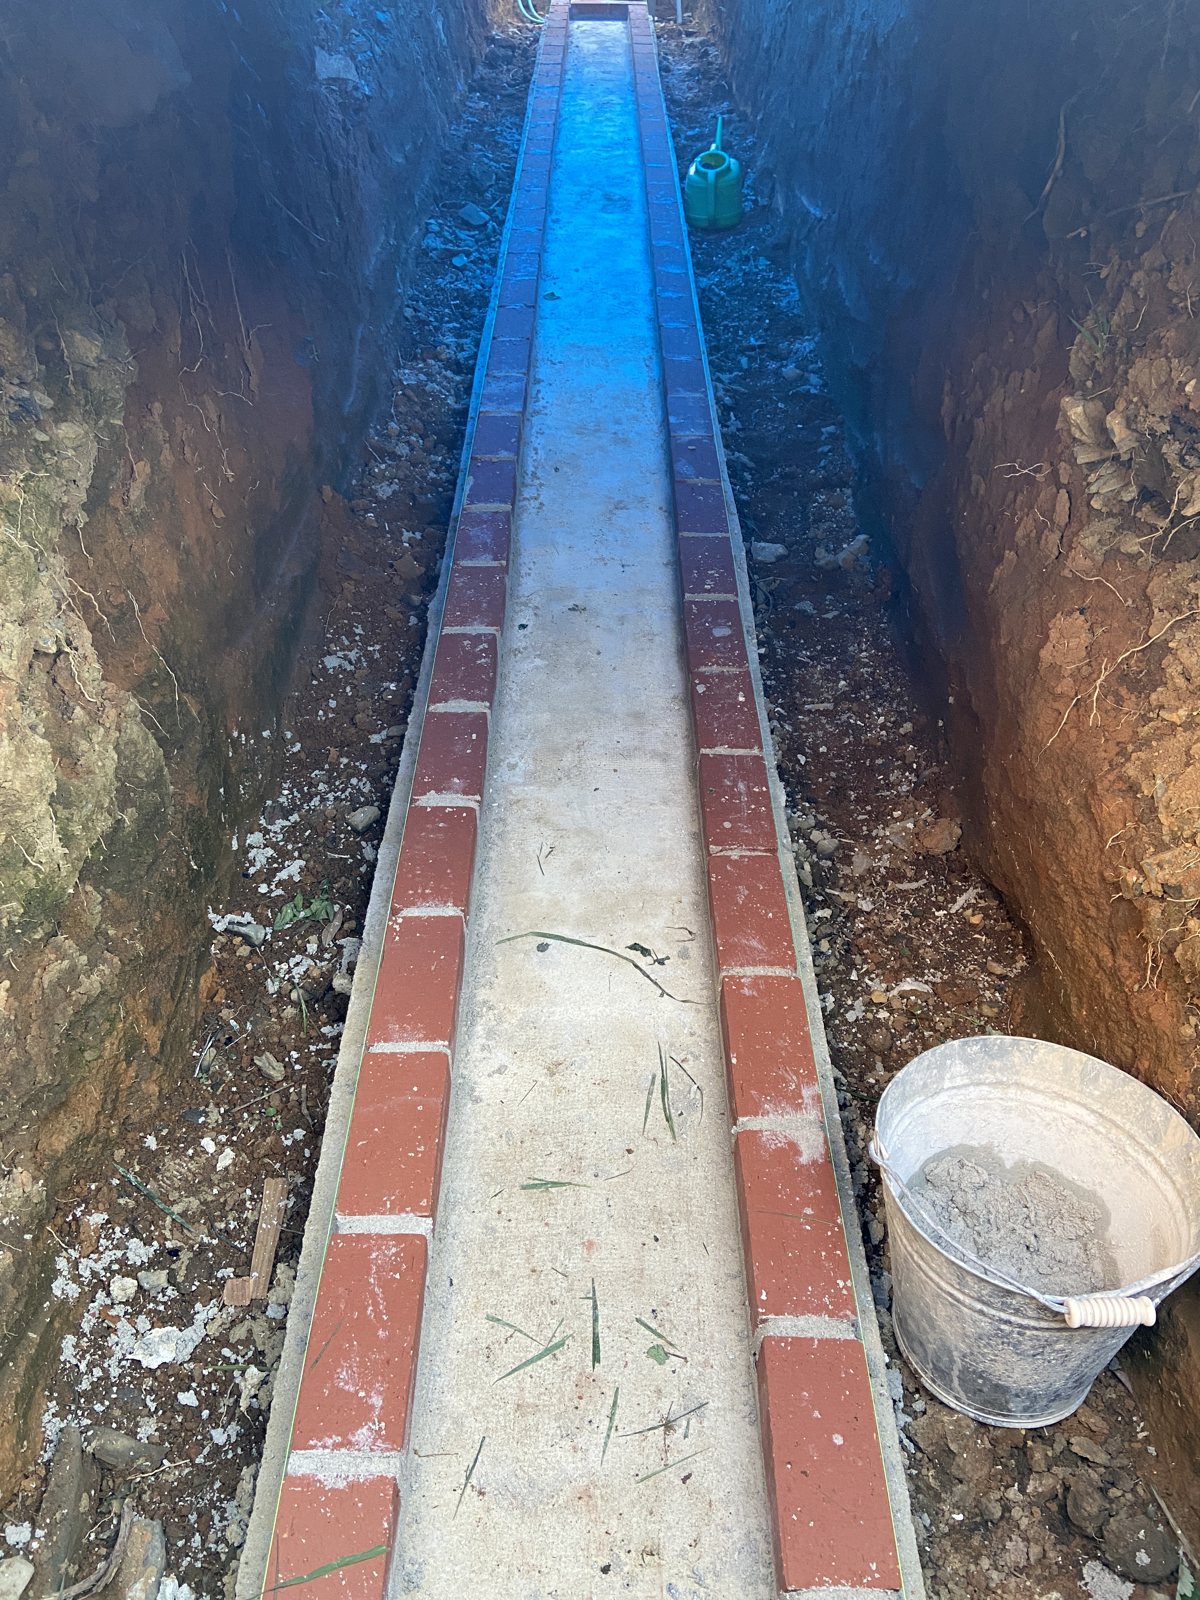
Step 5. Floor and edging (May 2025)
We poured a concrete floor and lined both edges with brick. This part holds incoming solids as the anaerobic zone. A solid floor and clear edges keep the stone and gravel layers above stable.
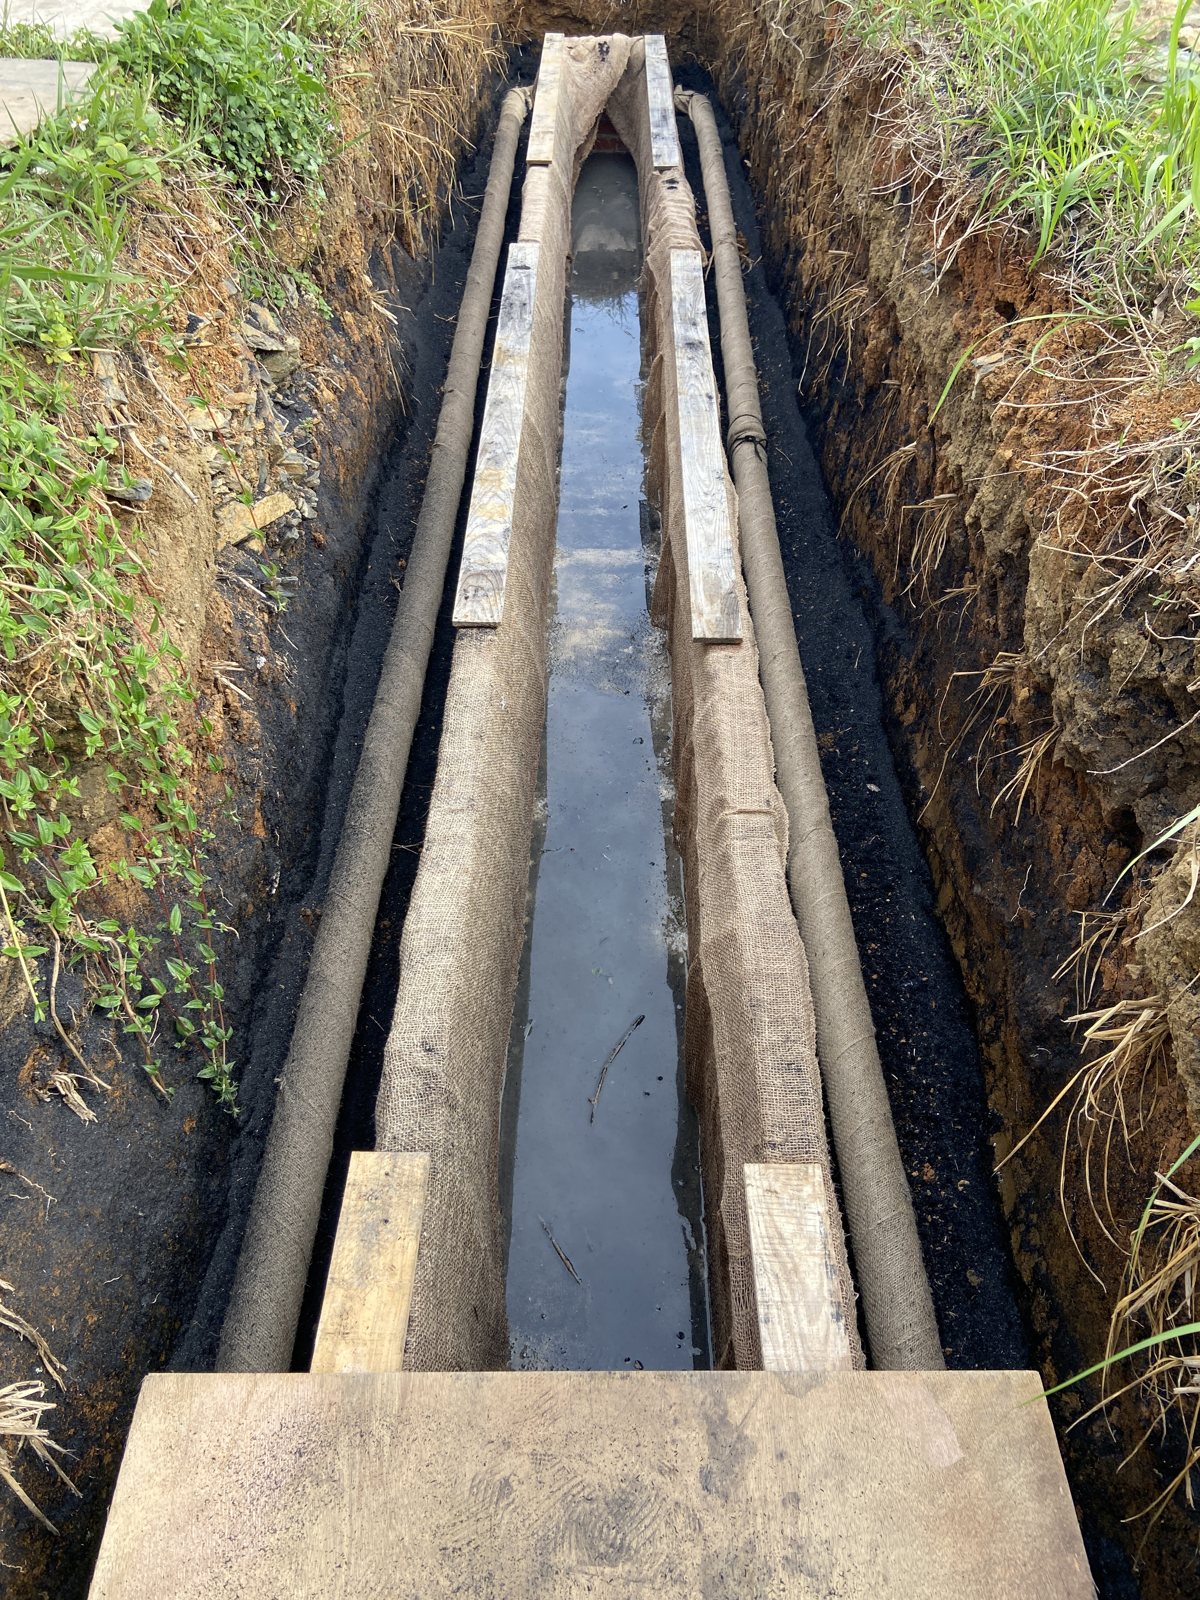
Step 6. Side walls, pipes and charcoal backfill (May 2025)
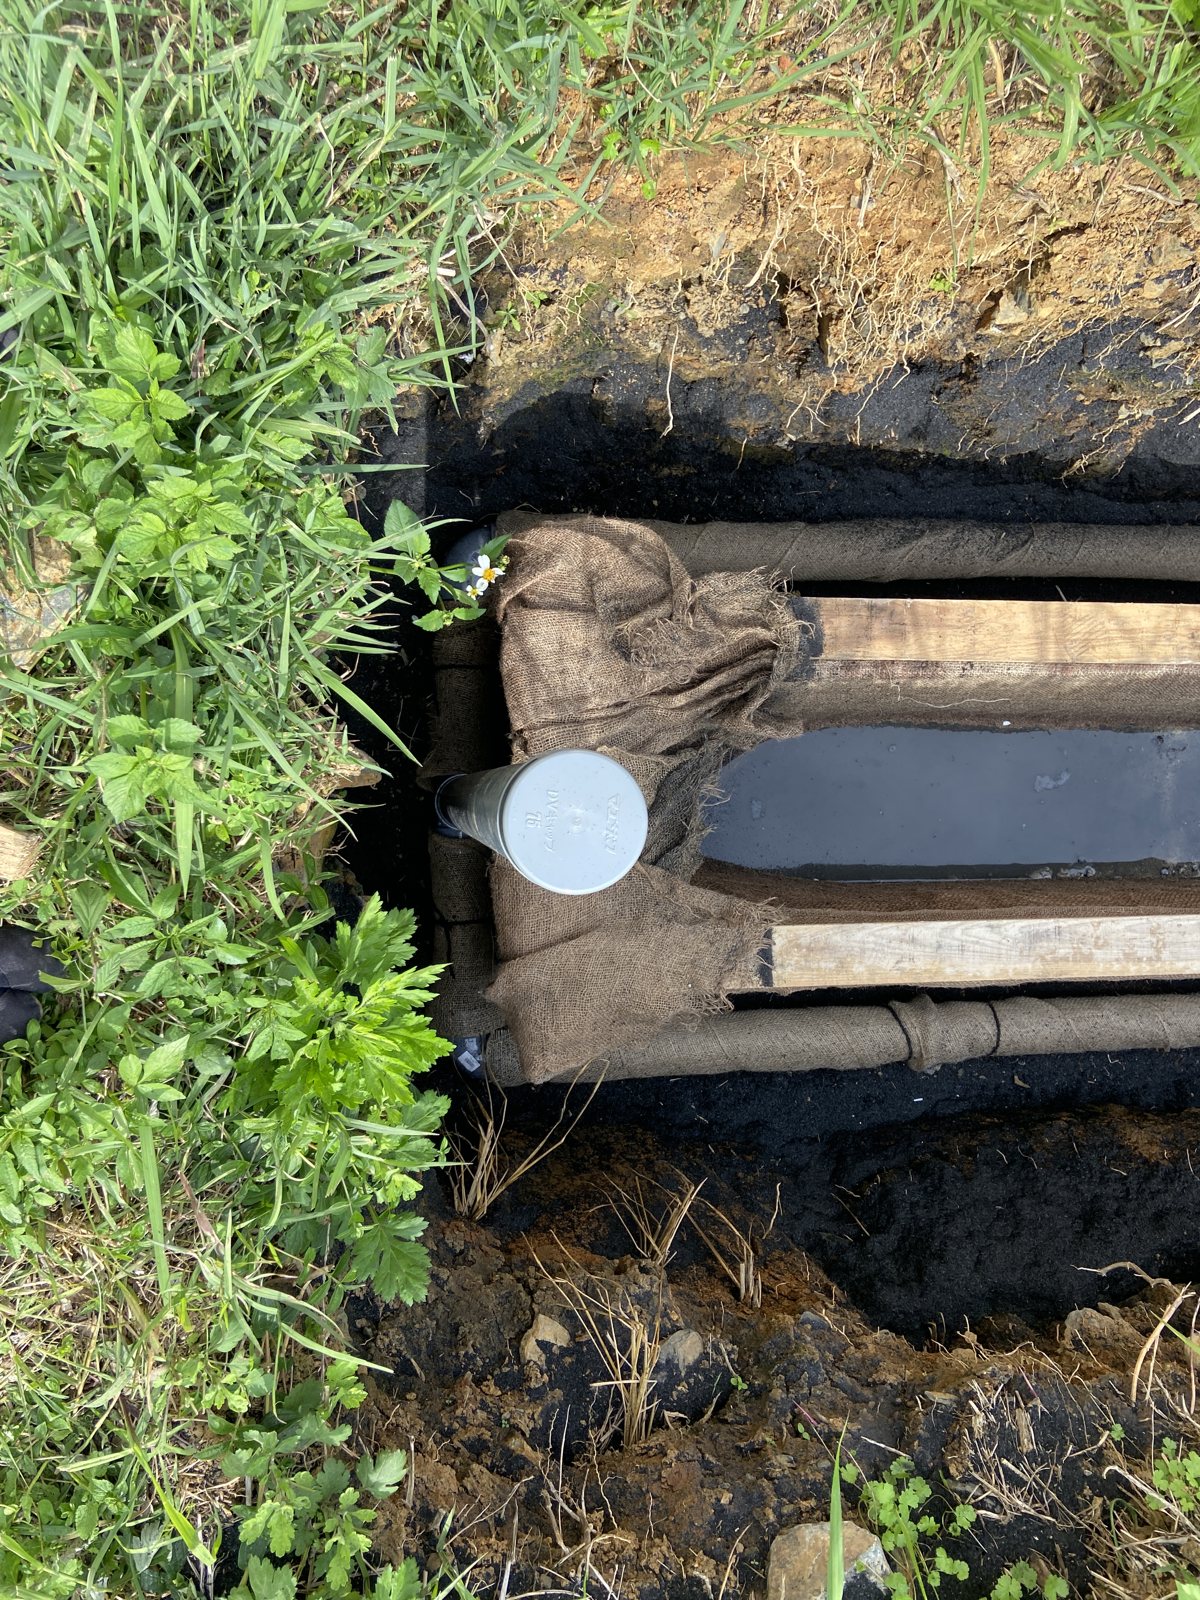
We formed the side walls with boards and jute cloth and ran jute-wrapped pipes along both outer sides. The space around the chamber was backfilled with charcoal and tamped repeatedly. Charcoal keeps its internal pores even when compacted, creating a wall that is firm yet able to breathe.
Steps 7–9: Stone Layers and Vertical Holes
Step 7. Round stones and an inspection box (December 2025)
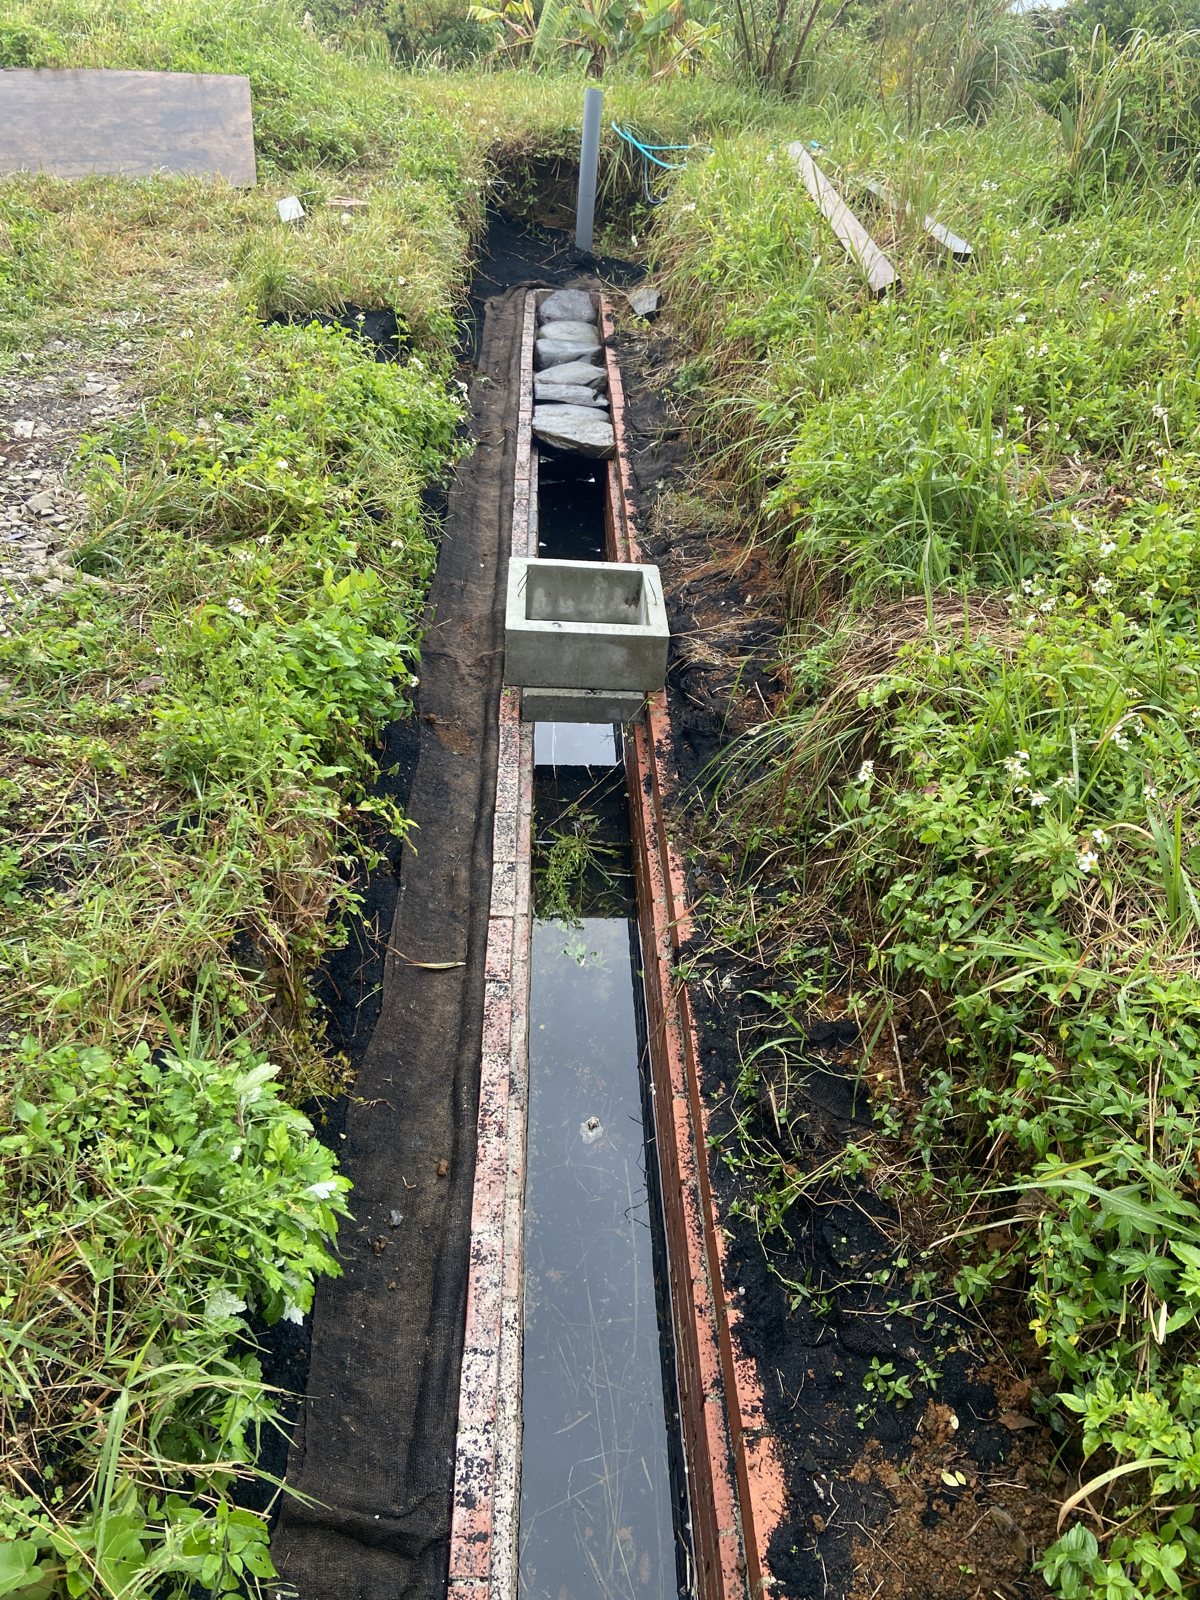
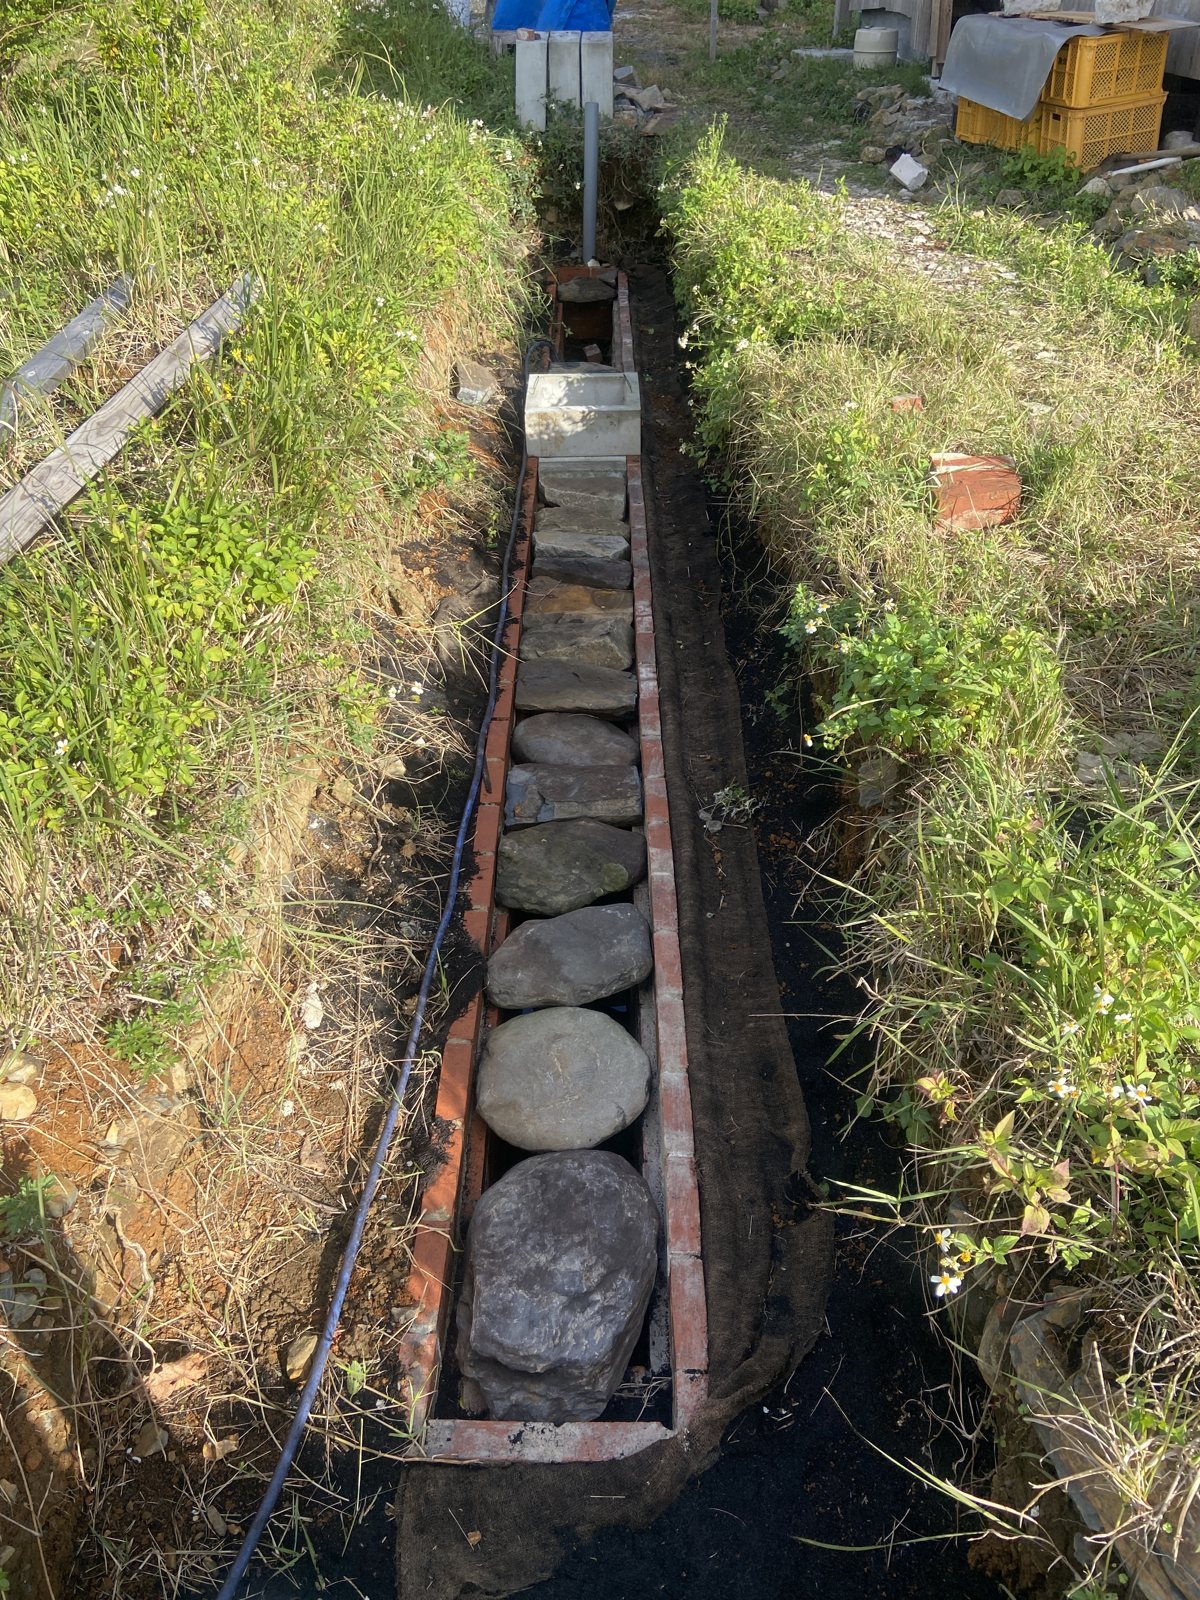
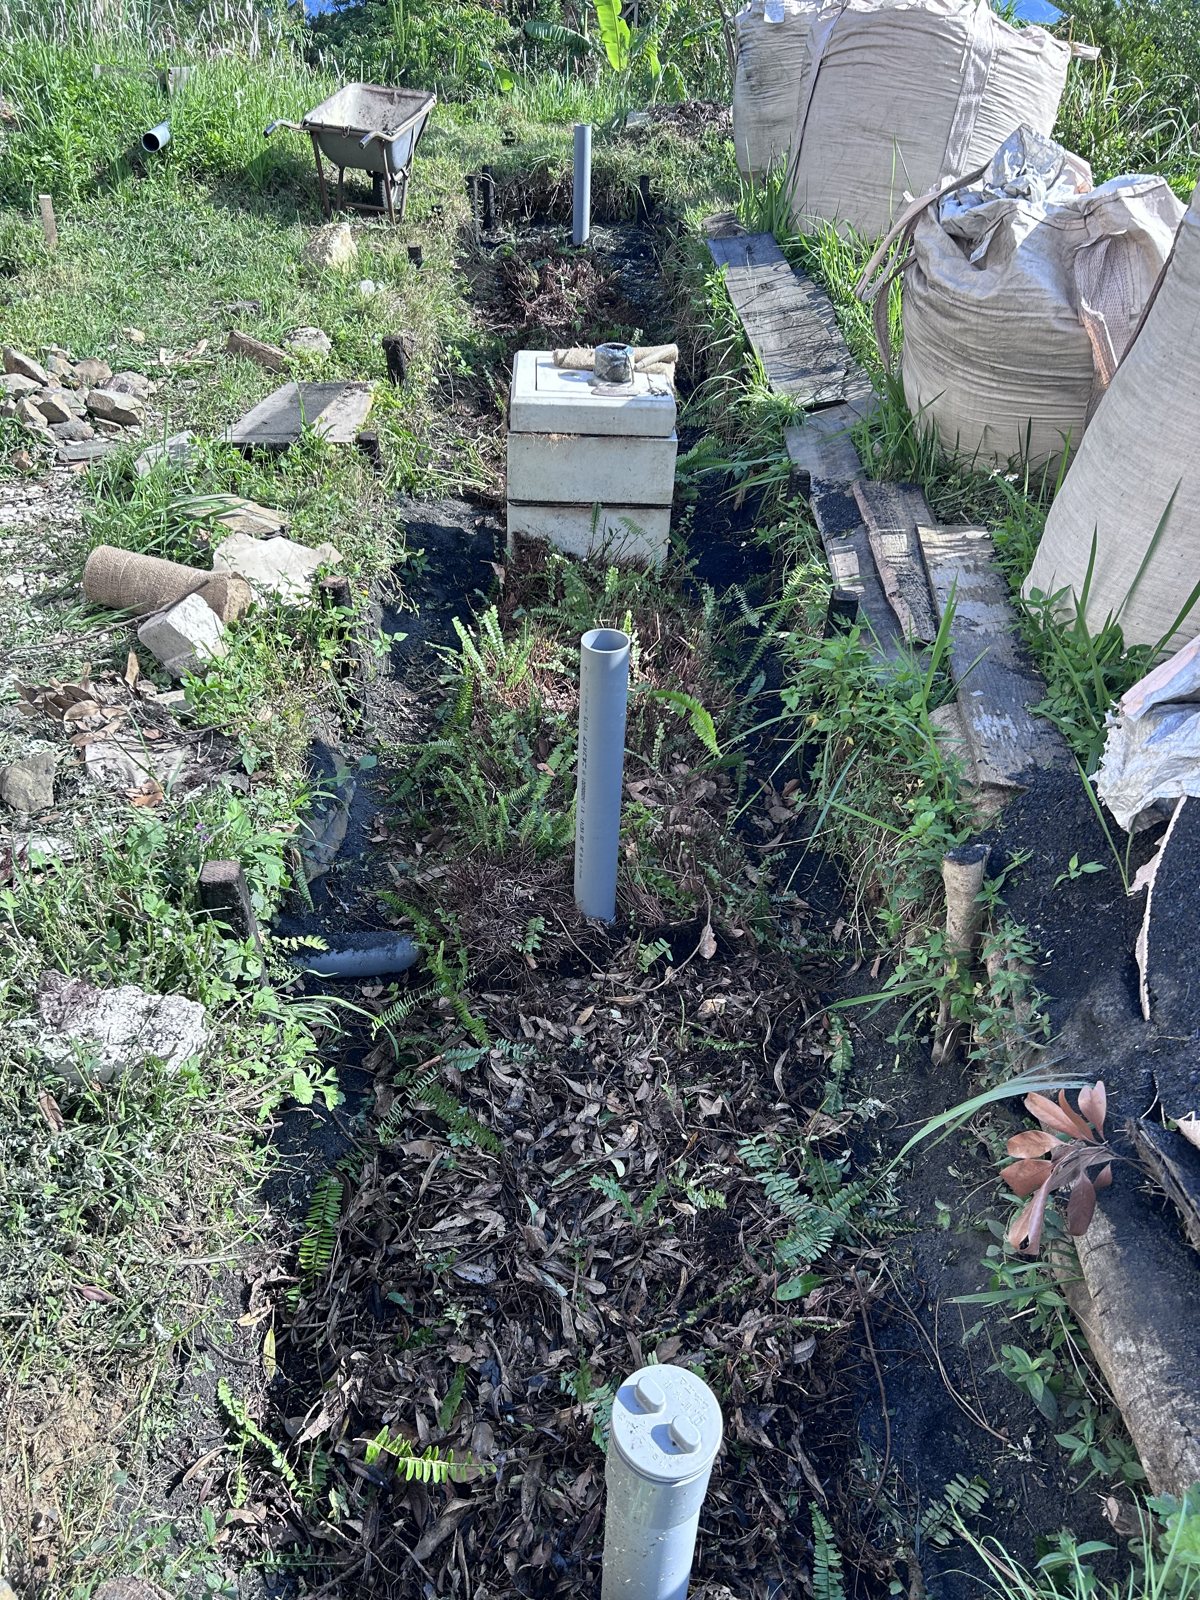
We filled the chamber with rounded river stones. The large gaps between them let clarified water and air pass, and biofilms form on the stone surfaces. A concrete inspection box was set partway along so we can check conditions later.
Step 8. Split-stone cover and a gravel layer (January 2026)
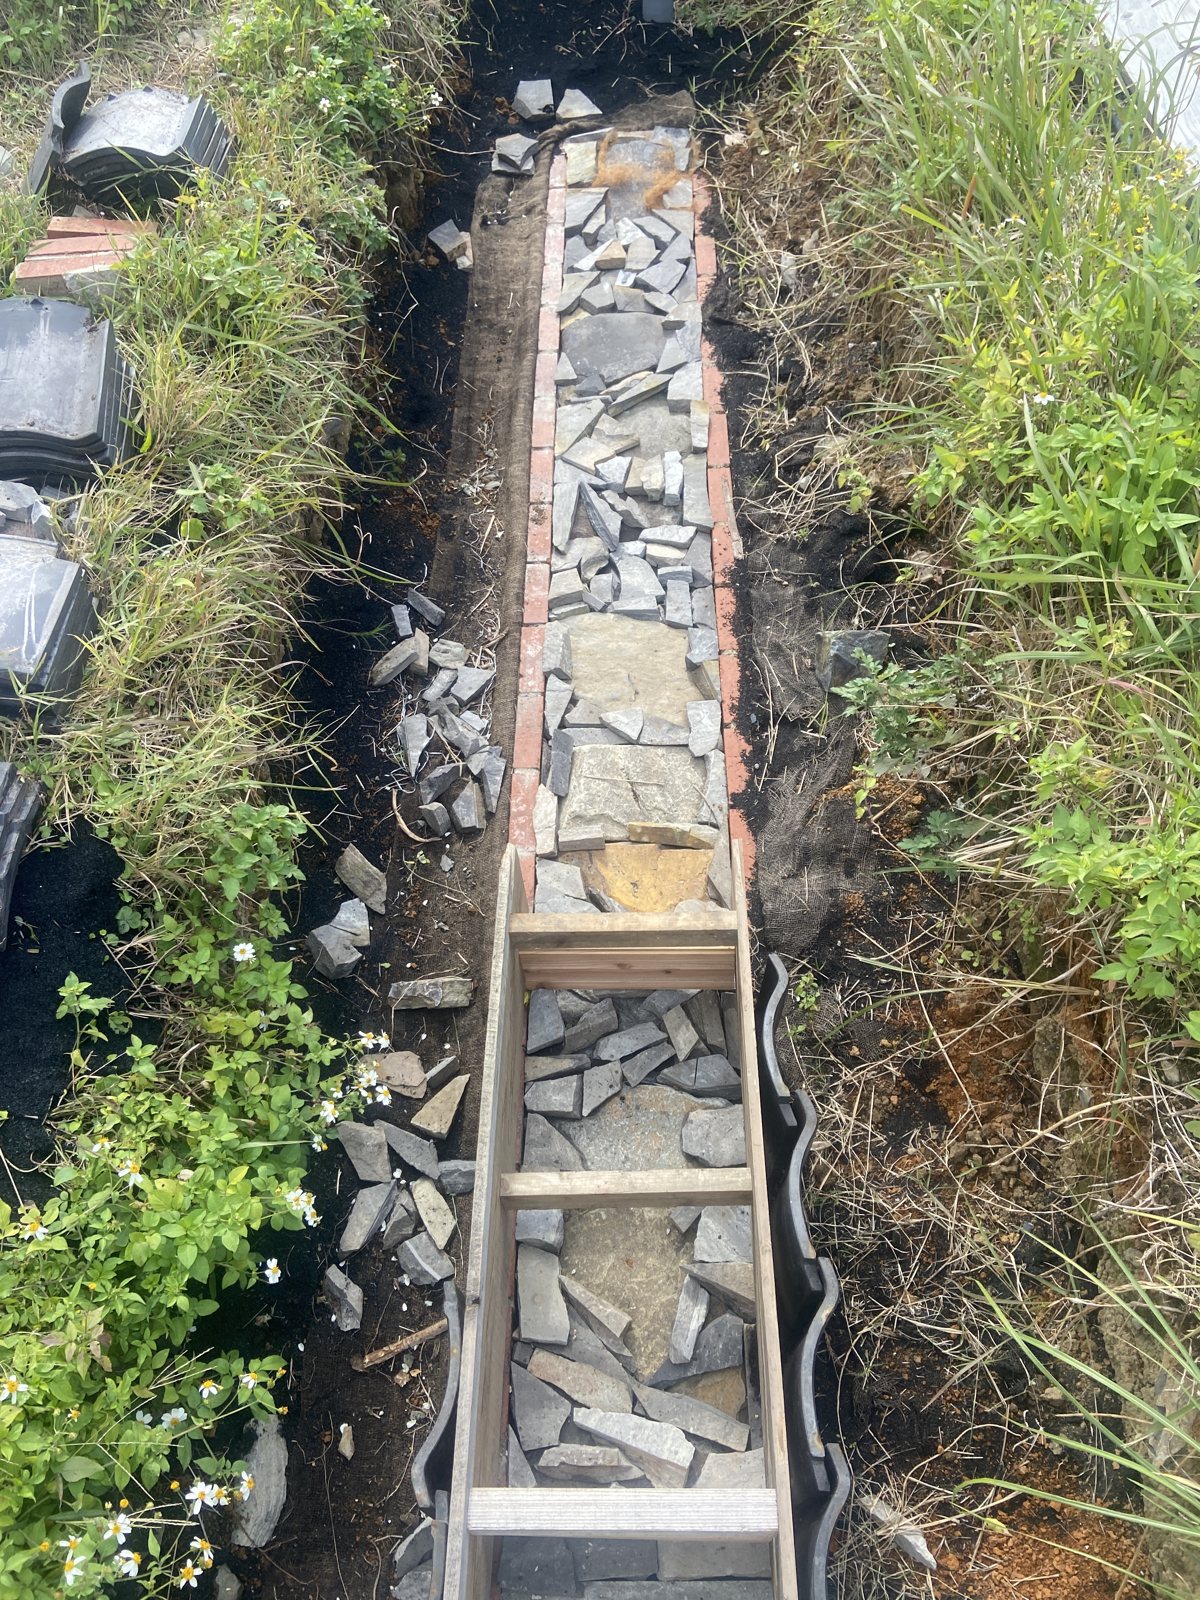
We covered the round stones with split stones, framed both sides with timber and corrugated edging, and filled with crushed stone. The split stones act as a lid, stopping fine particles from filling the voids below. The edging keeps the gravel and the surrounding charcoal from mixing.
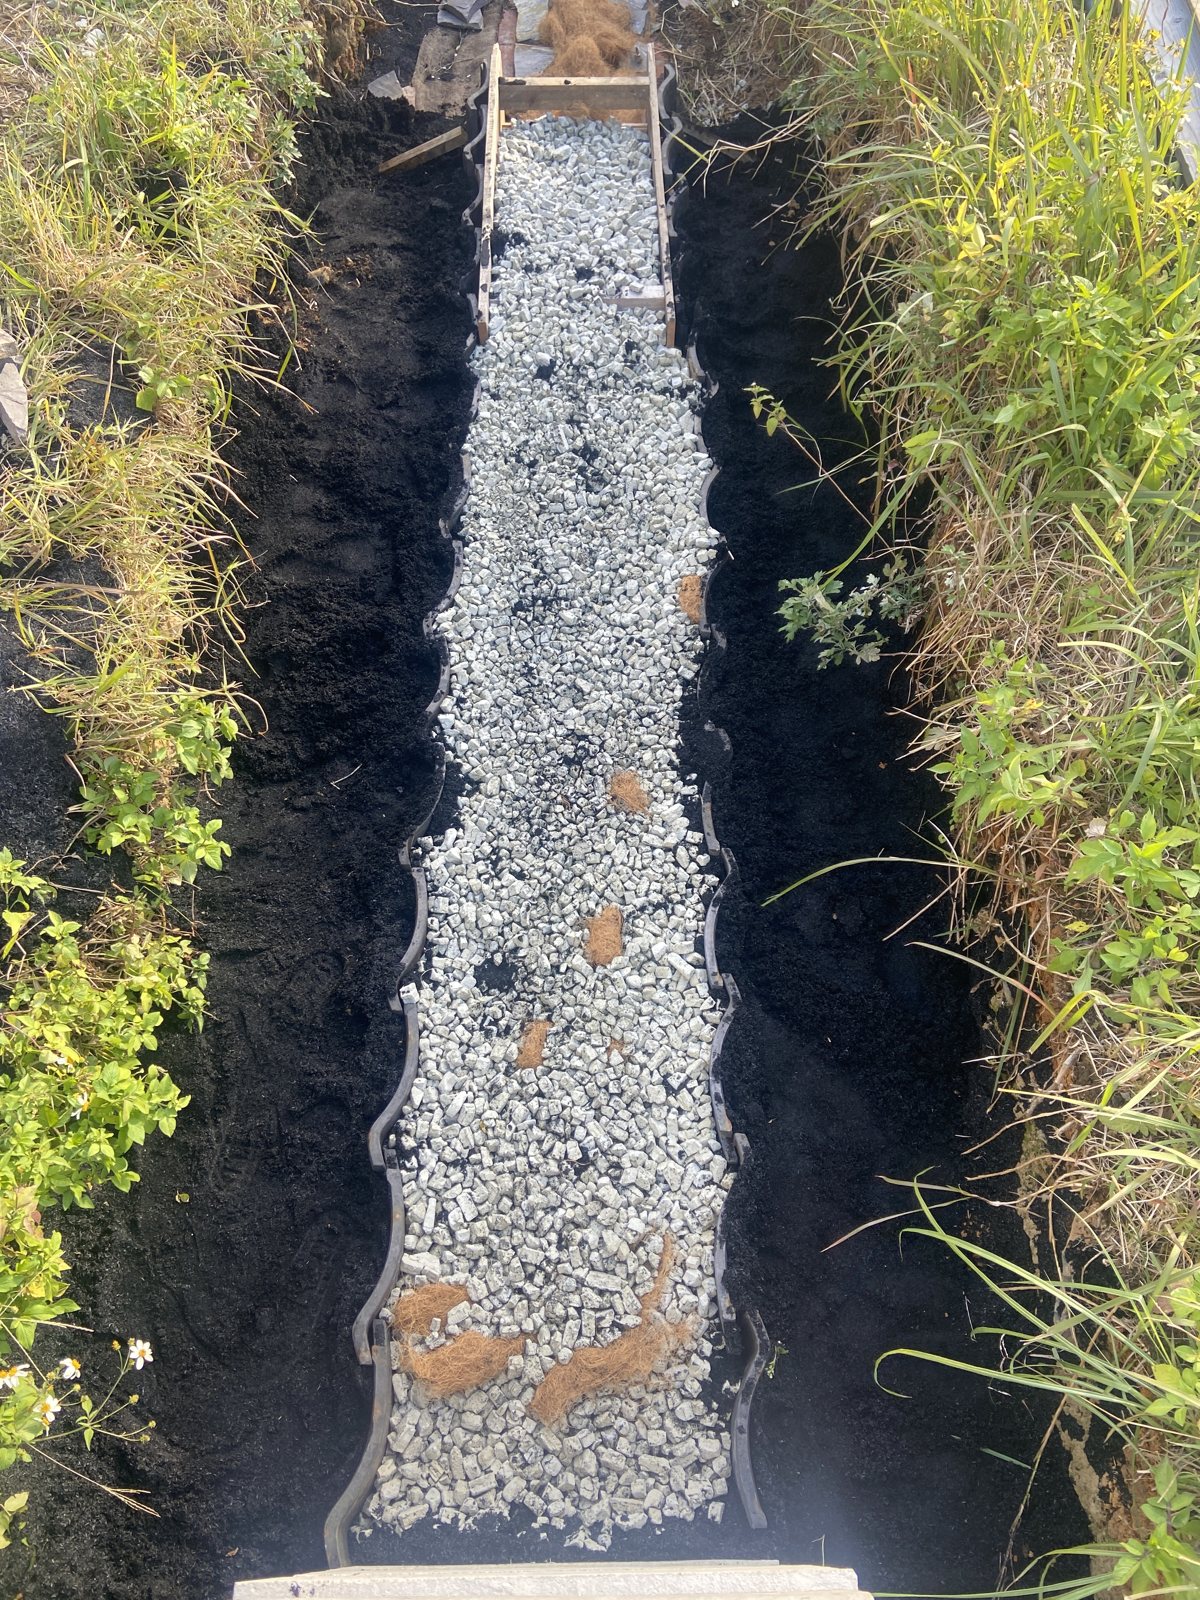
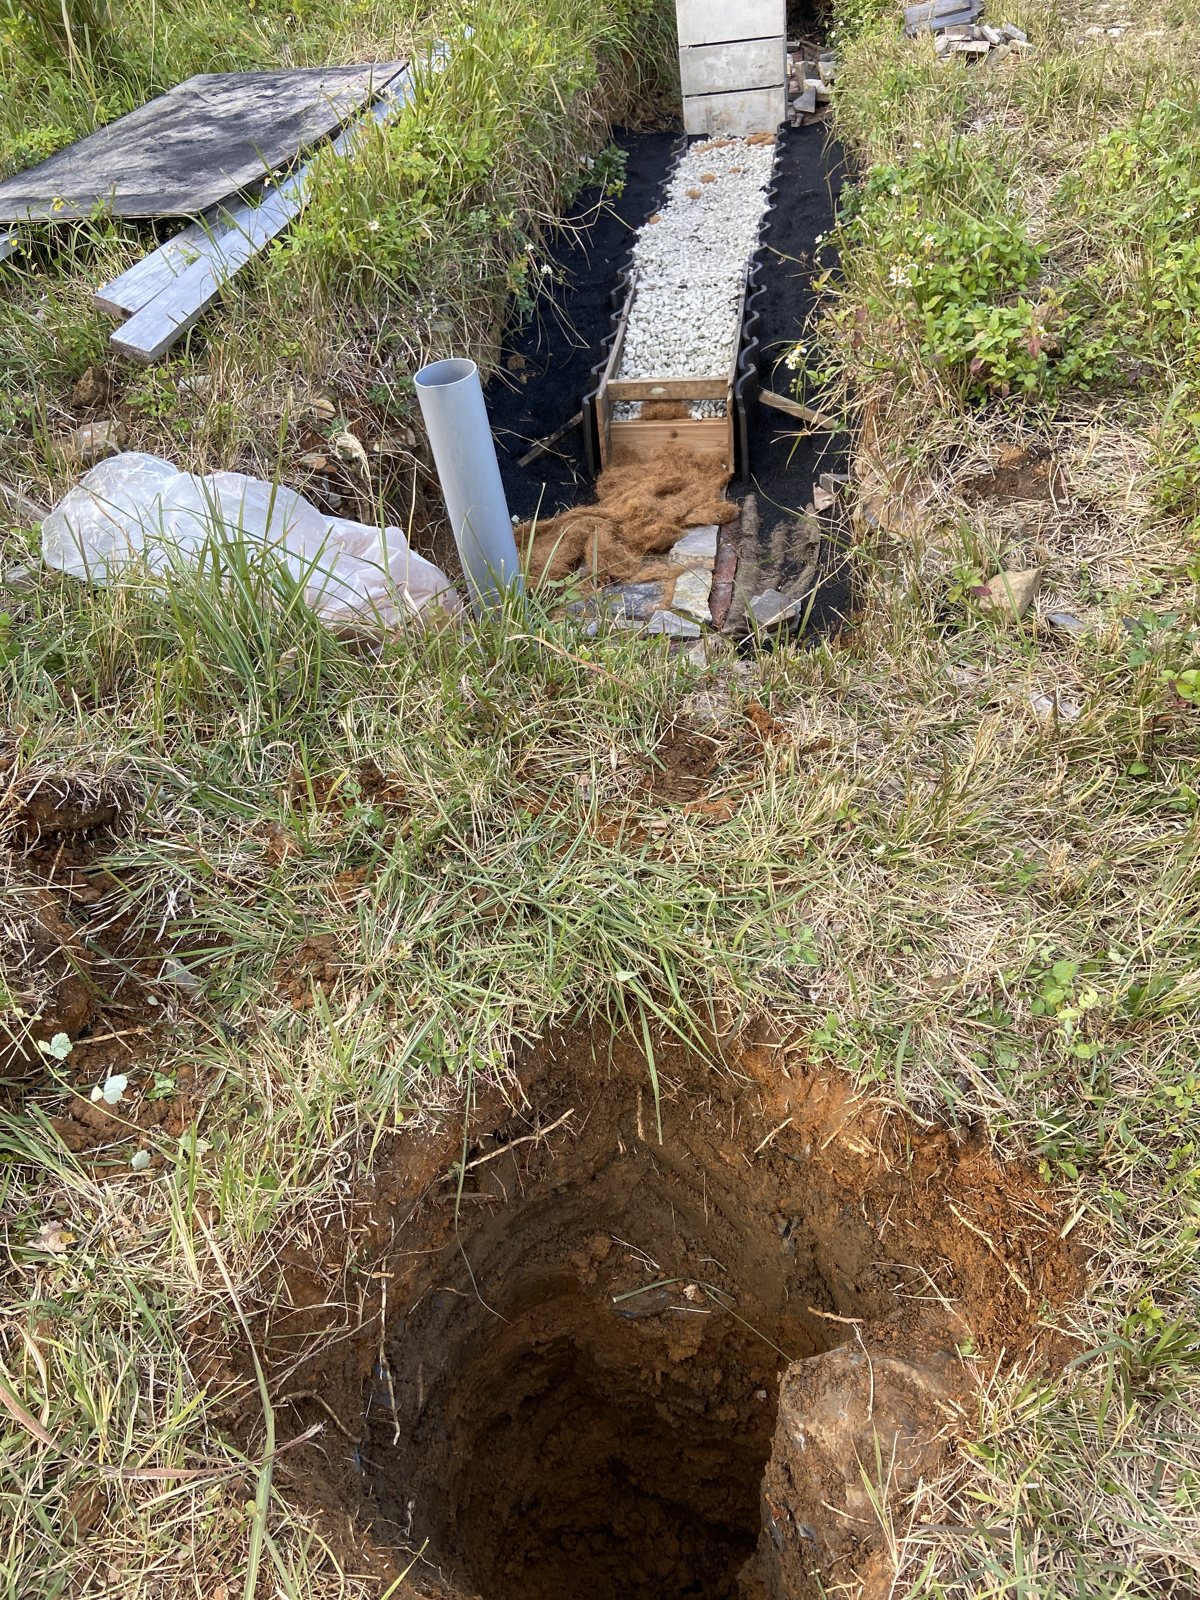
Step 9. Deep vertical holes downstream (January 2026)
At the downstream end we dug deep vertical holes and inserted pipes. These holes guide water and air from near the surface into deeper layers, spreading water three-dimensionally instead of collecting it in one place.
Steps 10–12: Infiltration Pit and Finishing
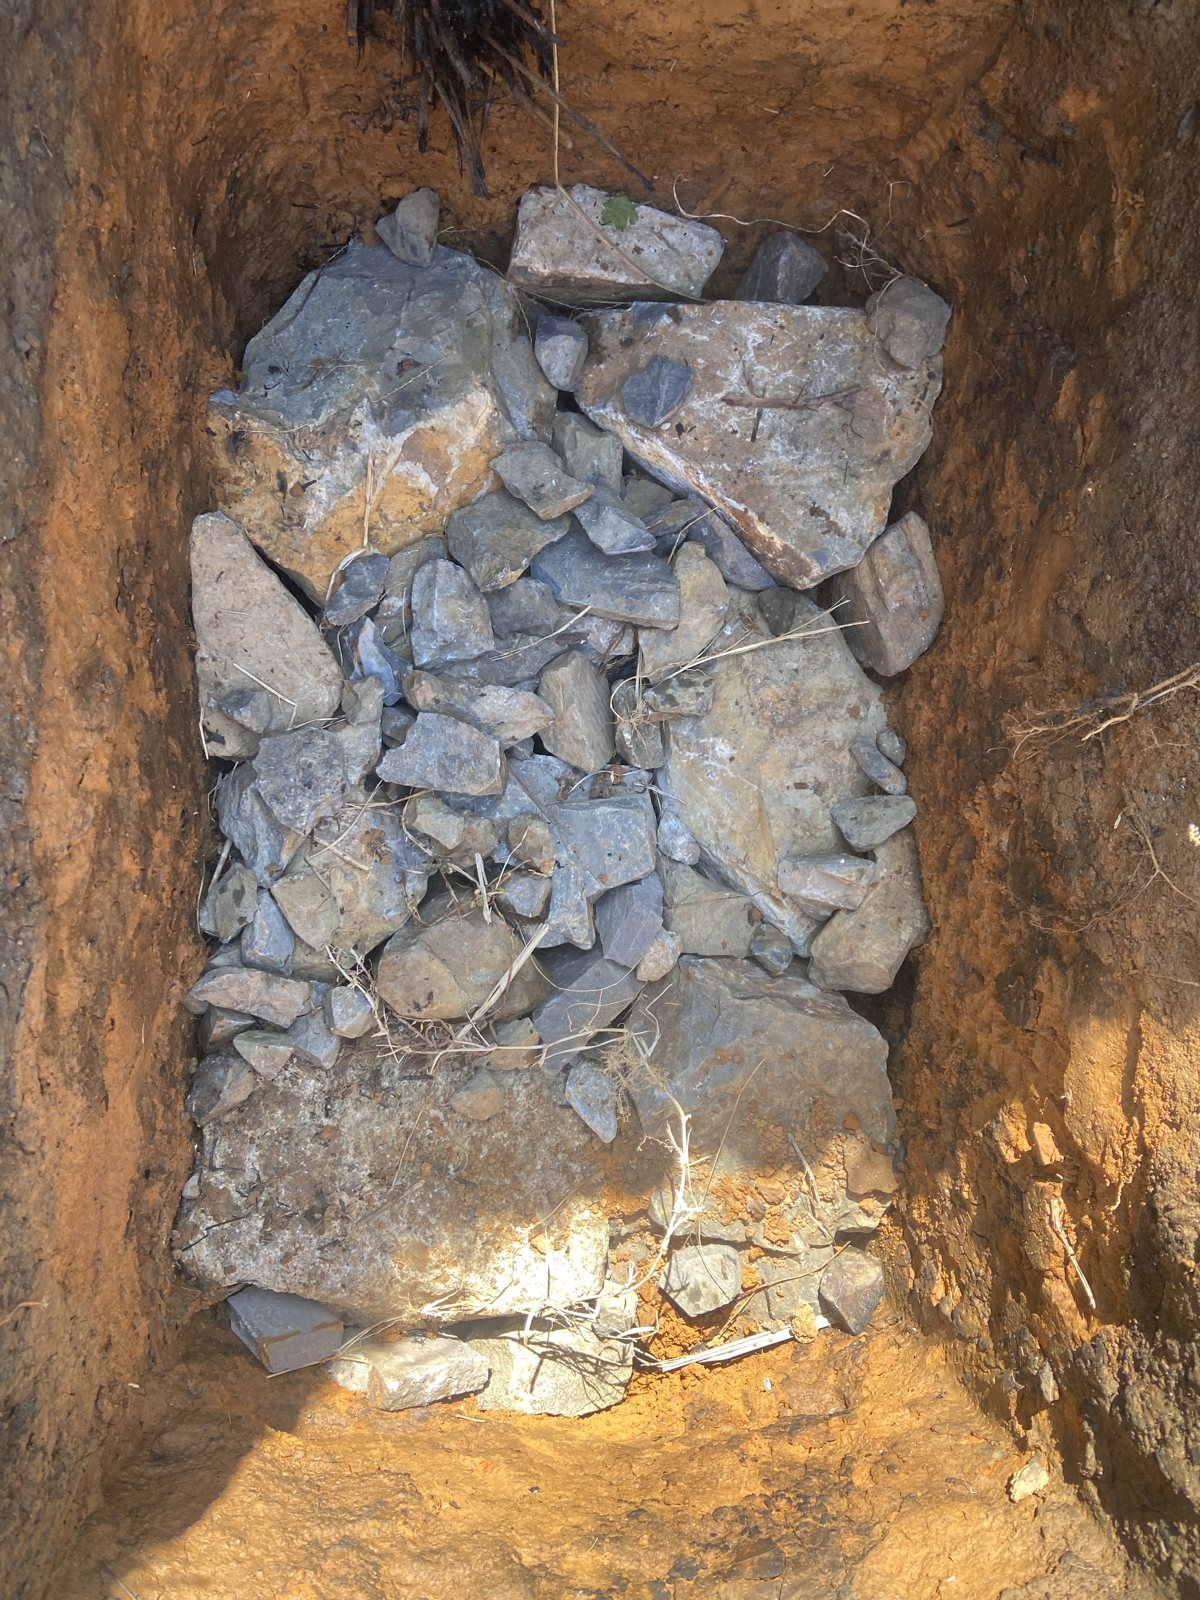
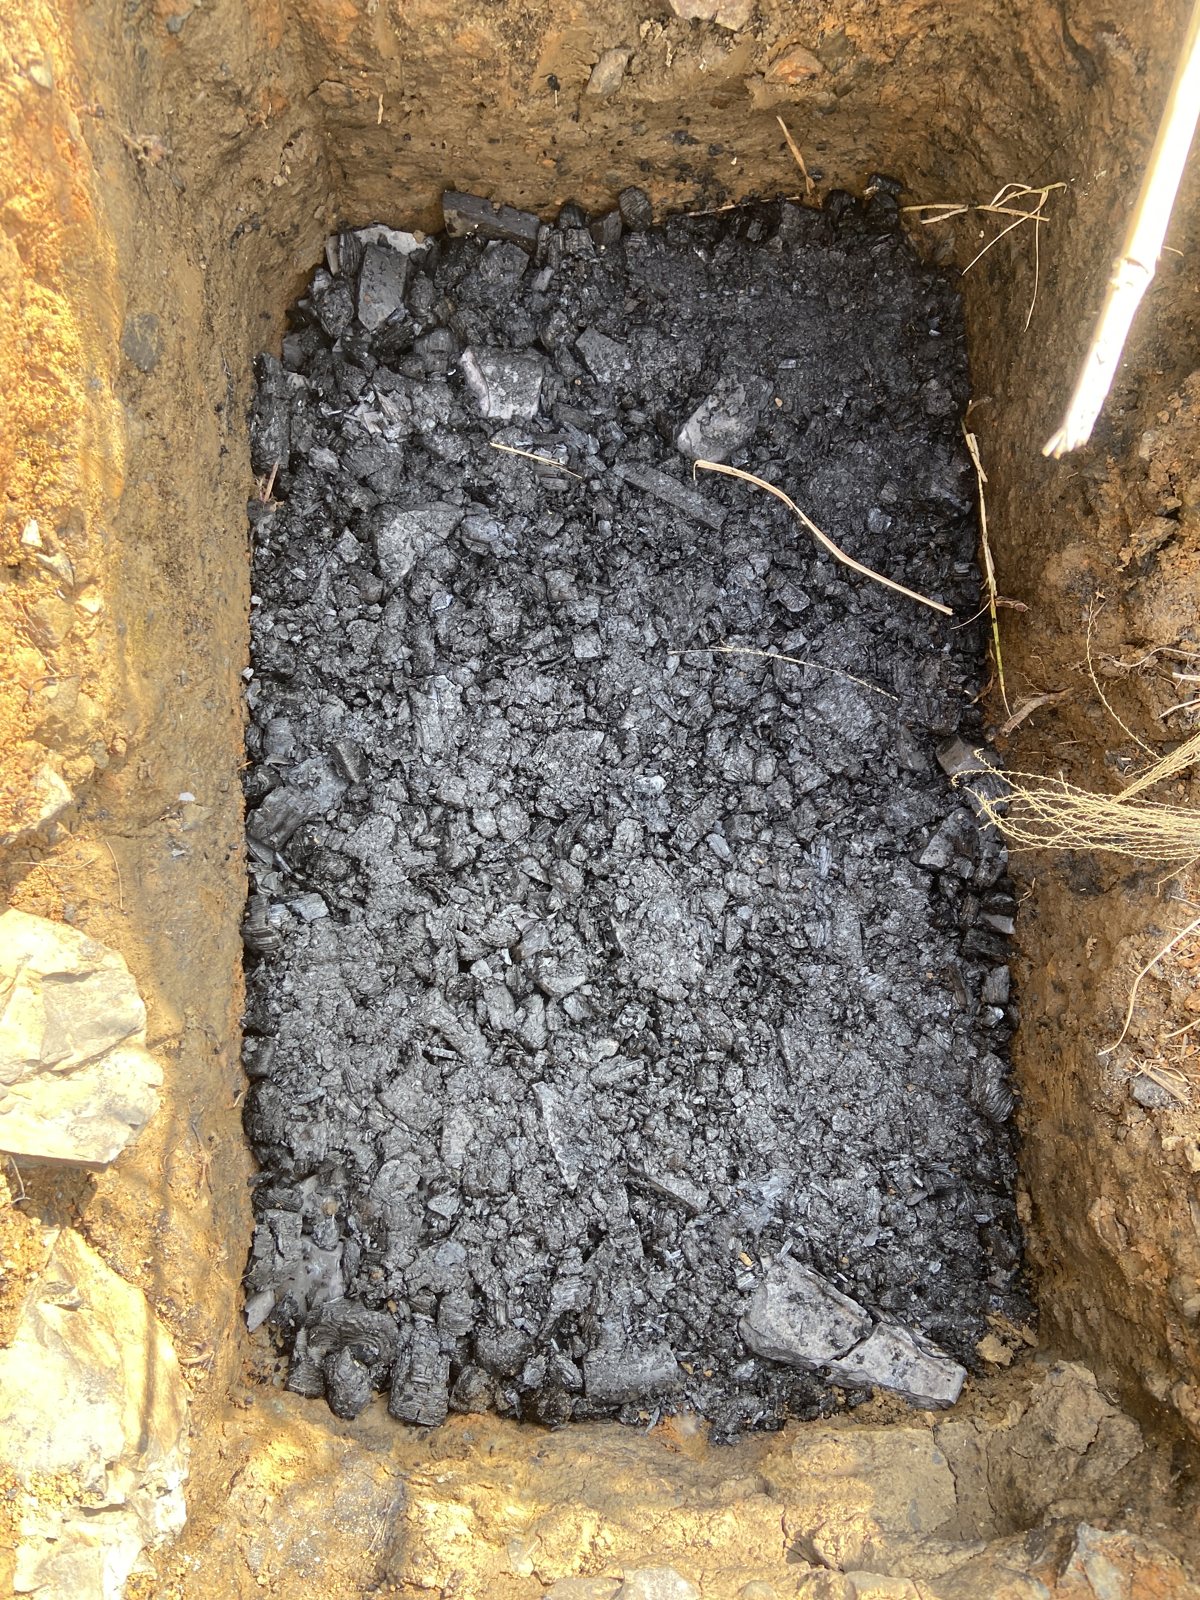
Step 10. Rubble stone and charcoal in the infiltration pit (February 2026)
In a separate square pit we packed rubble stone and topped it with fine stone mixed with charcoal. The voids hold water temporarily and release it slowly into the surrounding soil.
Step 11. Distribute water with a perforated pipe (February 2026)
We laid a filter-wrapped perforated pipe over the gravel layer so water spreads across the whole bed instead of loading one spot. The drain from the house was connected at this stage.
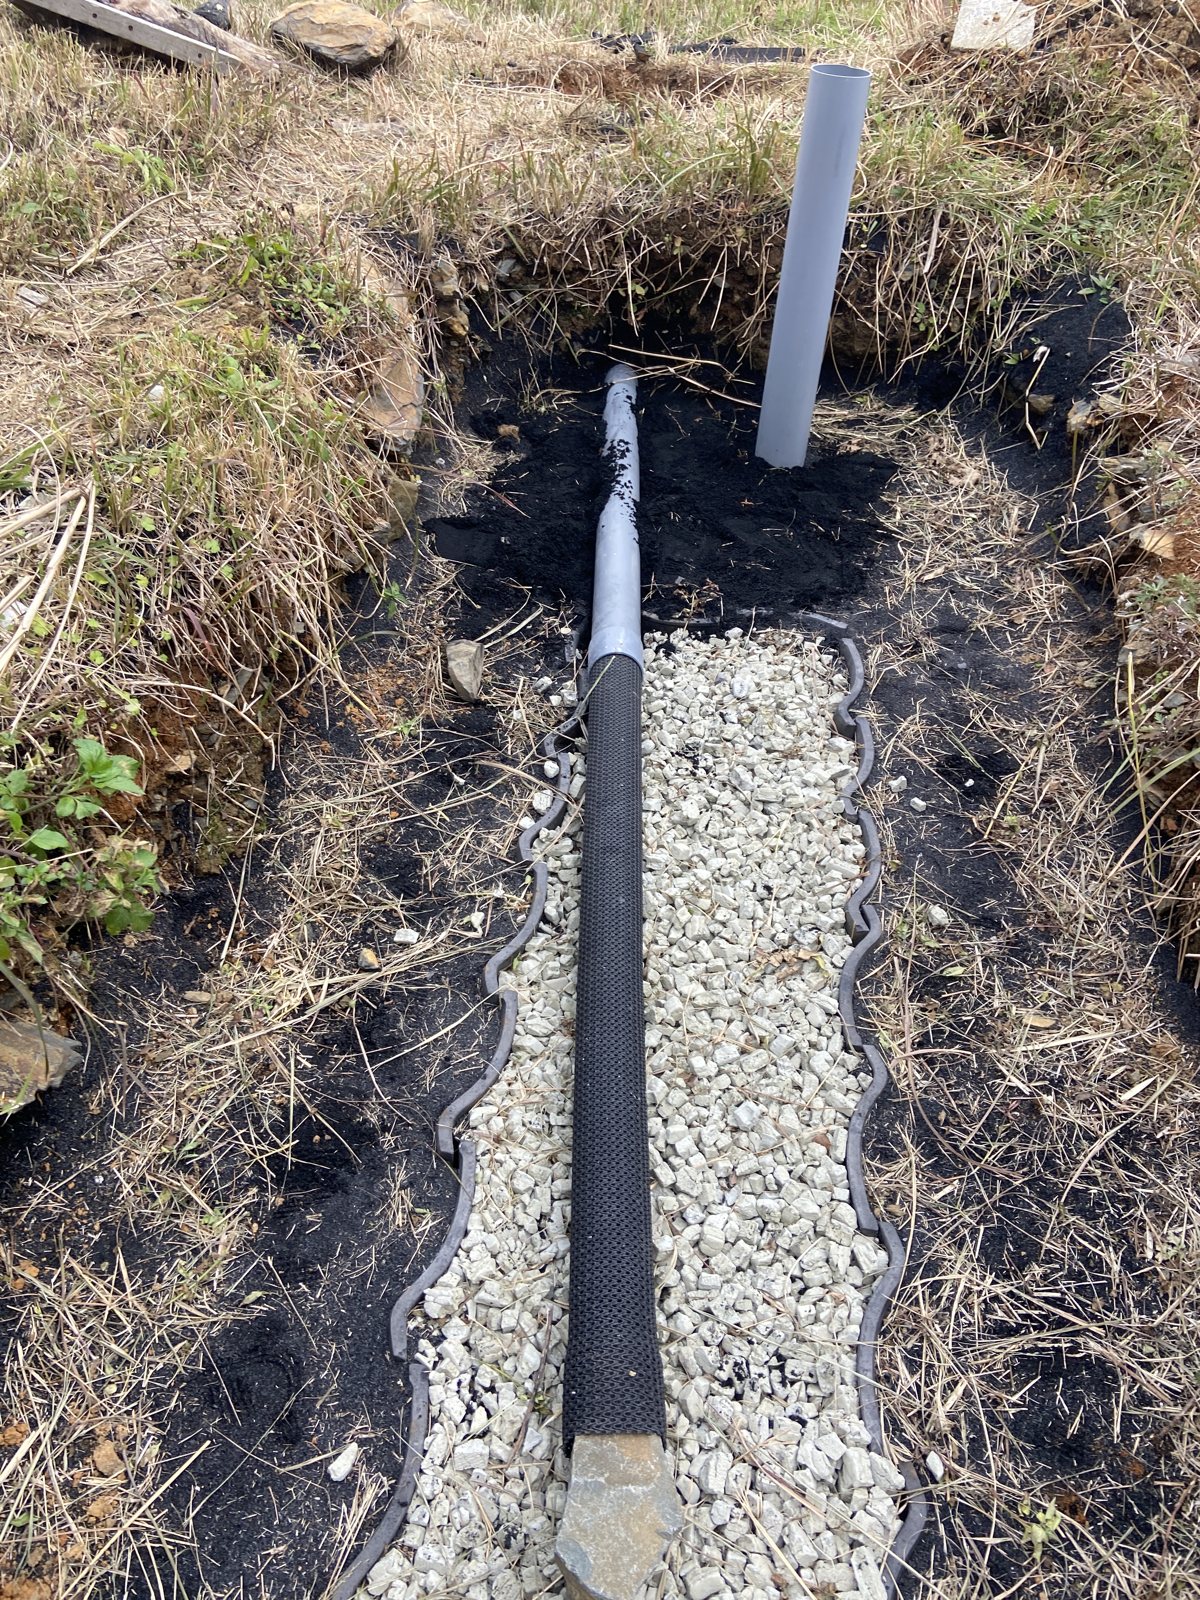
Step 12. Coir, jute, leaves and wood chips (April–May 2026)
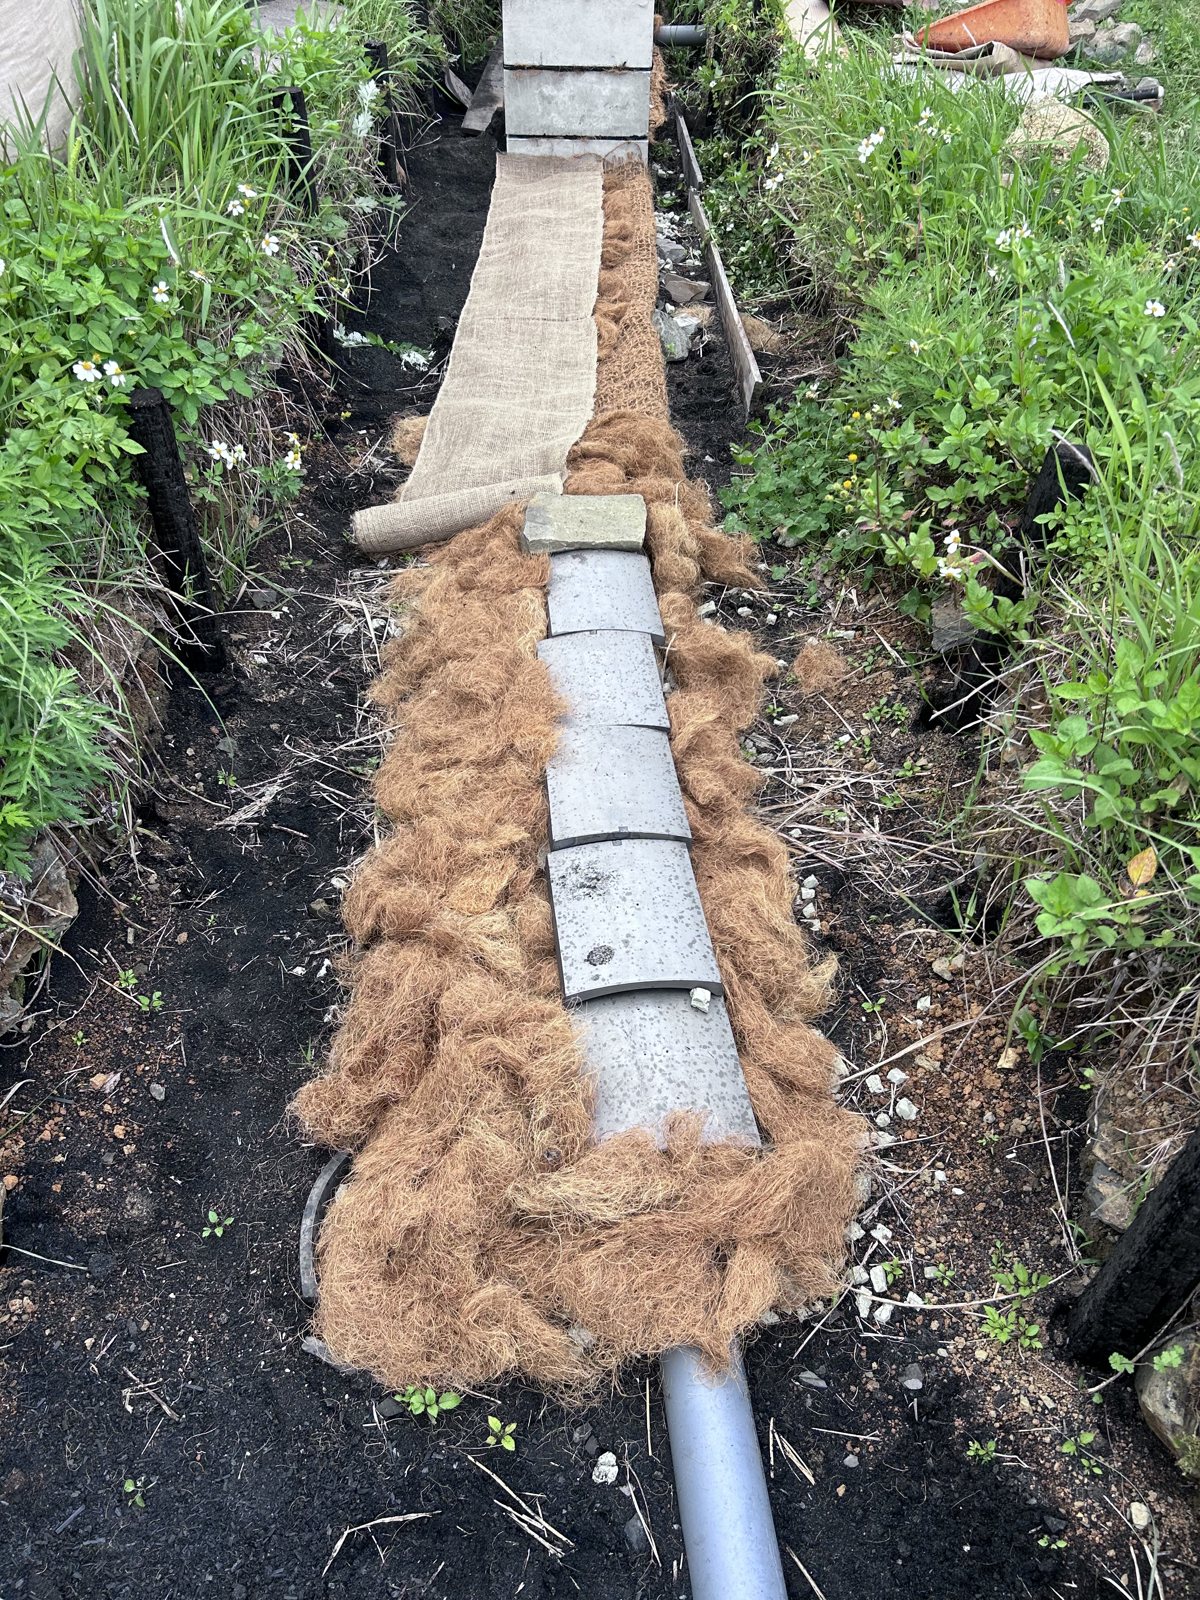
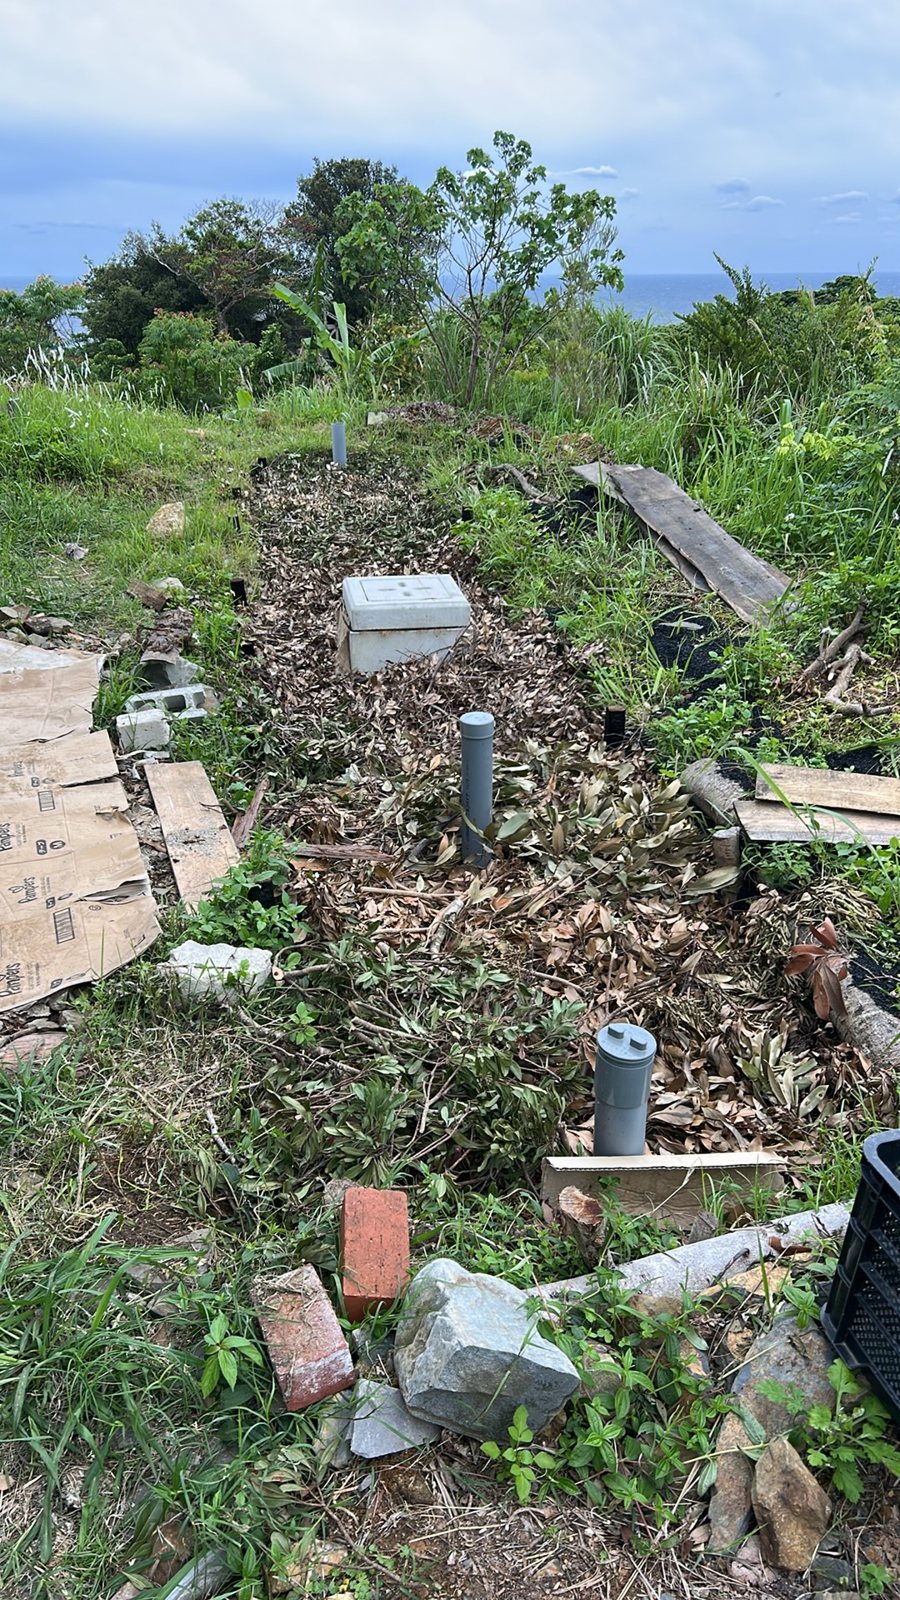
We covered the pipe and gravel with coir and jute, spread a thick layer of leaves, and finished the surface with wood chips. The covering stops soil from falling into the layers below; the mulch prevents rain from sealing the surface. All of it will decompose into topsoil.
Key Points for Construction
- Floor level and fall: work back from the drain pipe and keep long runs level to avoid overloading one section
- Keep layers separate: round stone, split stone, gravel and charcoal each have a role; protect the boundaries with jute or edging
- Tamp the charcoal: loose charcoal settles, and it keeps its pores even when compacted
- Leave inspection windows: inspection boxes and risers let you check water level and odor later
- Avoid digging in the rainy season: rain in an open trench weakens the walls and damages the base
In Japan, facilities that treat toilet waste fall under the Johkasou Act. If you are considering a similar system, consult your local authorities before you build. We cover the regulatory side in part one.
Frequently Asked Questions
Q. How long did it take to build the wastewater treatment system?
Our self-build took about 16 months, from excavation in January 2025 to finishing in May 2026, with pauses to check each layer. Continuous work would be faster, but the method does not require building everything at once.
Q. What should you watch for when backfilling with charcoal?
Tamp it repeatedly. Loose charcoal settles later, but charcoal keeps its internal pores even when compacted, so the backfill stays firm while keeping air pathways open.
Q. Why cover round stones with split stones?
The split stones act as a lid that stops soil and fine particles from filling the voids between the round stones. Those voids carry water and air and host microbes, so they are protected with split stone, gravel and a covering layer.
Q. Which step requires the most precision?
The floor level of the chamber. If the level varies, water collects on one side and part of the system is overloaded. Work back from the height and fall of the drain pipe and keep long runs level.
Conclusion
- We built the system in stages: excavation, base, chamber, stone layers, infiltration and distribution, then covering and mulch
- The key is layering materials with different roles and protecting the boundaries between them
- Level accuracy, tamped charcoal and inspection access are hard to fix later, so do them carefully from the start
- The method allows pauses between stages to check each layer
Can the same idea support a guesthouse or restaurant? We answer that in this article.