

日本語版: 石場建てをセルフビルドで建てたい人へ|手順・道具・注意点をプロが本音で解説
No concrete, no rebar, no anchor bolts — just a wooden pillar resting on a natural stone. Ishibadate, Japan’s traditional stone-foundation construction, has become one of the most talked-about methods in the natural building and self-build community. The foundation requires no concrete pour, minimal machinery, and nothing but stone, earth, wood, and charcoal. It is entirely natural to look at it and think: I could build this myself.
In this article, we walk through the actual process we use on our own job sites, with photos from a real project, in as much practical detail as we can. And then we tell you the honest part: which stages are realistic to do yourself, and where the risk becomes too large to carry alone. By the end, you should have a clear line between “do it myself” and “talk to a professional first.”
Why Ishibadate Attracts Self-Builders — and Why It Is Harder Than It Looks
The appeal is real and concrete:
- No concrete foundation: formwork, rebar, and ready-mix logistics — the most intimidating stages for an amateur — simply do not exist.
- The land stays alive: foundation stones support the building at points, so rainwater keeps infiltrating and the soil keeps breathing. Remove the stones, and the land returns to open ground.
- Natural materials only: stone, earth, timber, charcoal — most of it sourced locally.
But here hides the central misunderstanding: no concrete does not mean the foundation work is easier. A thick concrete slab spreads the building’s load across the whole footprint, averaging out minor variation in the ground beneath it. Ishibadate has no such buffer. The soil under each individual pillar determines that pillar’s fate, and the builder must be able to read it. That is both the fascination of this method and the core of its difficulty.
The First and Greatest Gate: Reading the Ground and Its Water
Choose the building spot on a rainy day
The outcome of an ishibadate build is largely decided before the first hole is dug. Walk the site the day after heavy rain. Watch where water collects and where the ground dries first. A spot where water lingers, where the soil smells sour and stays clammy, is a spot where air and water have stopped moving through the ground. Set a foundation stone there and the ground will loosen with every season — the beginning of differential settlement, where each pillar sinks at a different rate.
Check the building rules before you dig
In Japan, ishibadate does not fit the prescriptive rules of the Building Standards Act, so any building that requires a permit needs limit strength calculation to prove its safety — and even small huts inside city planning areas generally require permits. If you are building outside Japan, your local code will almost certainly require foundations to be anchored, with its own pathways for alternative methods. Either way, the rule is the same: confirm the legal situation with your local building authority before breaking ground. A structure built first and questioned later is extremely hard to legalize.
The Basic Sequence, Shown on a Real Site
Step 1: Excavation — dig the pit, read the soil
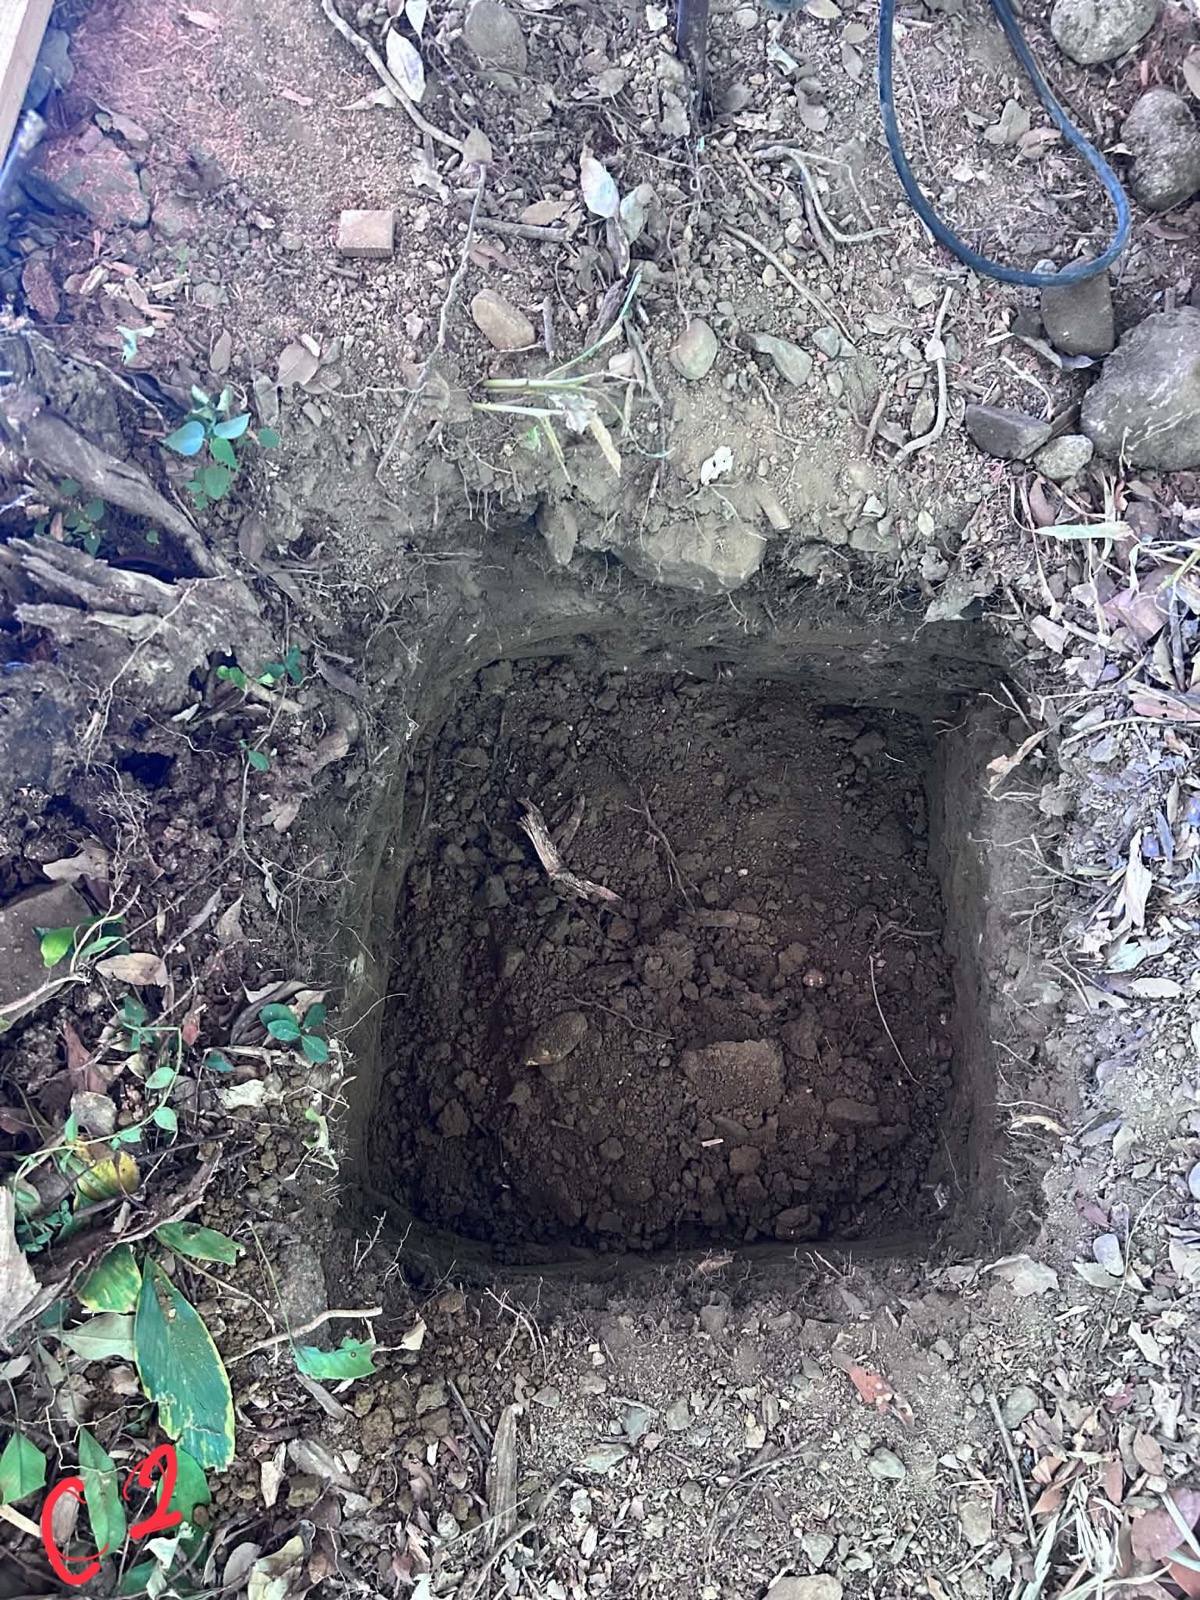
Dig a pit at each pillar position. Treat this not as labor but as your one chance to read the ground. Watch three things: the soil’s color (dark, crumbly soil is breathing; gray or bluish soil is waterlogged and oxygen-starved), how roots penetrate (fine roots running deep mean air and water are moving; roots running sideways along the surface mean the layer below is blocked), and whether water seeps in overnight. If a pit fills with water, reconsider the position — or build the water an escape route first.
Step 2: Groundwork — charcoal, then measure everything
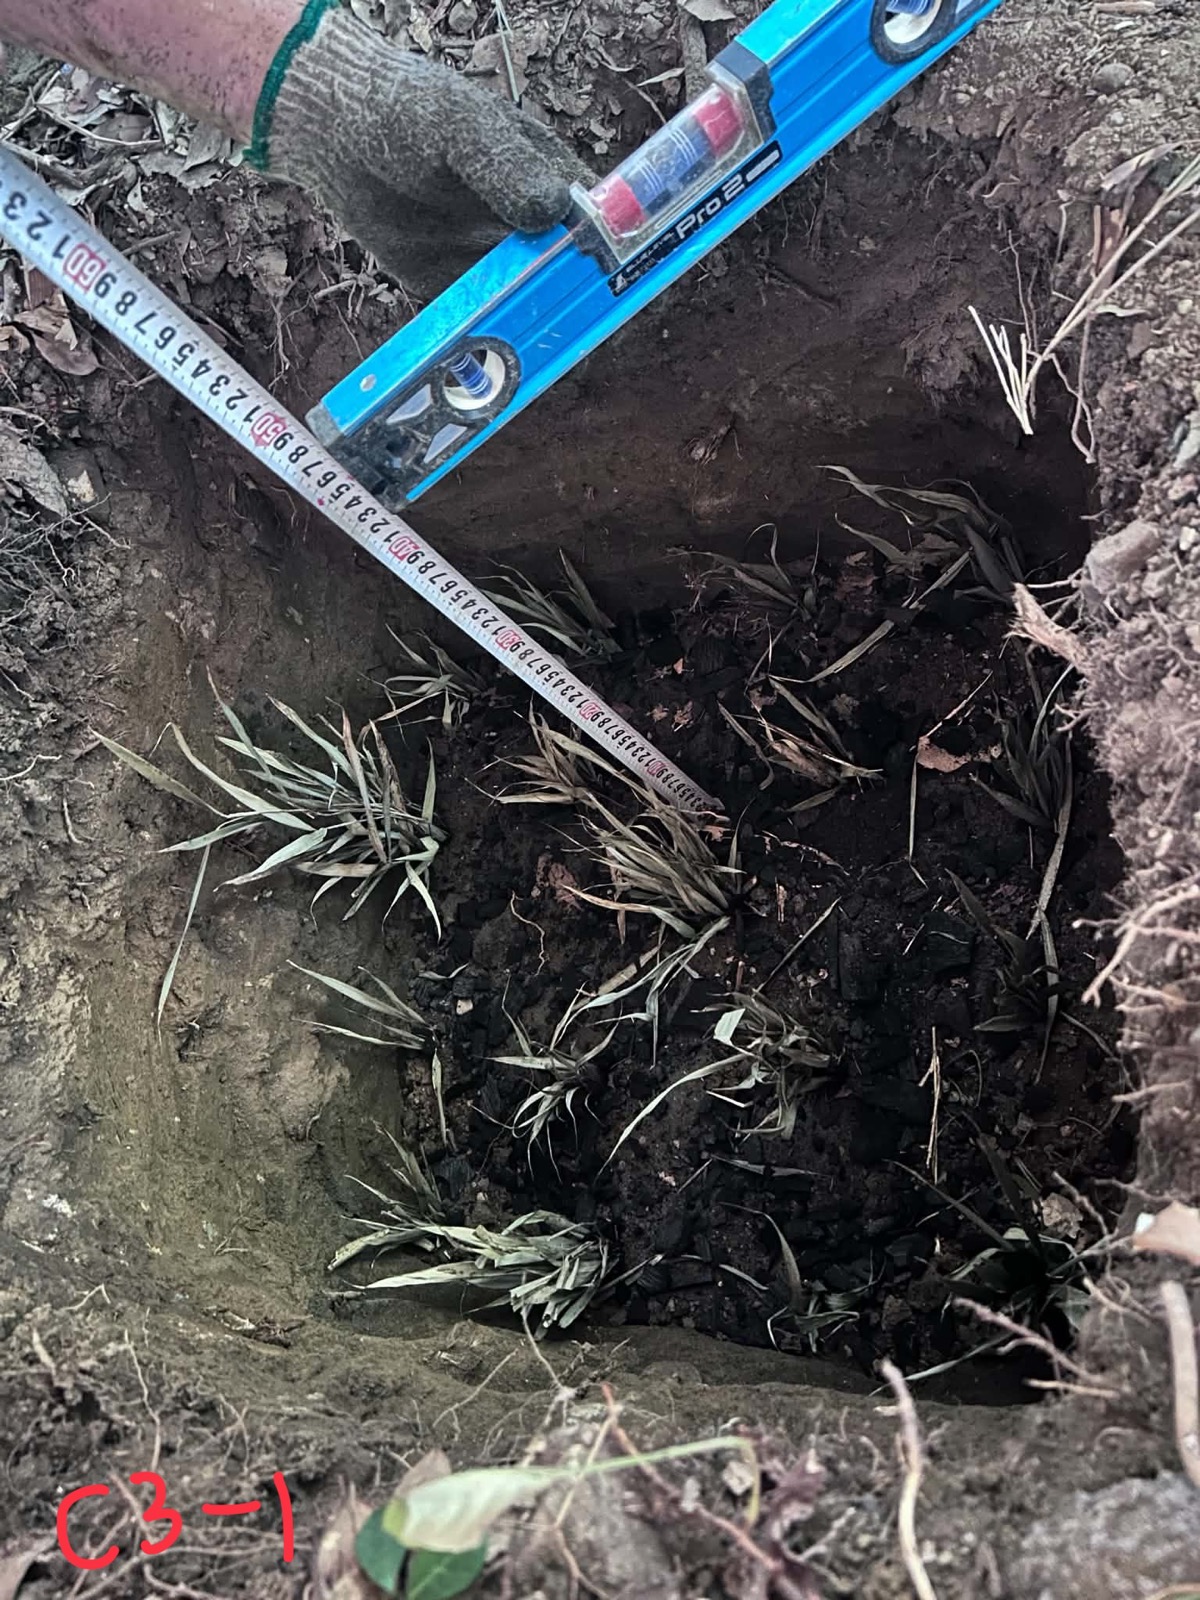
Line the pit bottom with charcoal and organic material such as cut grass. Charcoal is porous: it keeps air pathways open, buffers moisture, and houses fungal networks — turning the ground beneath the stone into a breathing layer rather than a sealed bottom. Then, as in the photo, check the depth of every pit with a tape measure and spirit level. It is tedious, and it is non-negotiable: the only way all stone tops will eventually sit level with one another is to measure from this stage onward.
Step 3: Crushed stone, in layers, tamped hard
Over the charcoal, add fist-sized stones and gravel in thin layers, tamping each layer firmly before adding the next. This compacted, free-draining bed sheds rainwater downward and keeps moisture from wicking up into the foundation stone — a well-drained cushion under every pillar.
Step 4: Setting the foundation stones
Set each stone on its tamped bed, choosing natural stones with broad, stable bases — each one carries the building’s full load at a point. Level the top with a spirit level, then compare heights between stones using a water level or laser level. Fine adjustment is then done with a bush hammer: the stone tops are dressed — tapped flat and true — until every stone sits level at matching height. Stone is a material you can dress to fit, and dressing the tops is far more reliable than repeatedly re-setting the stones.
Step 5: Dressing the stone tops and raising the pillars
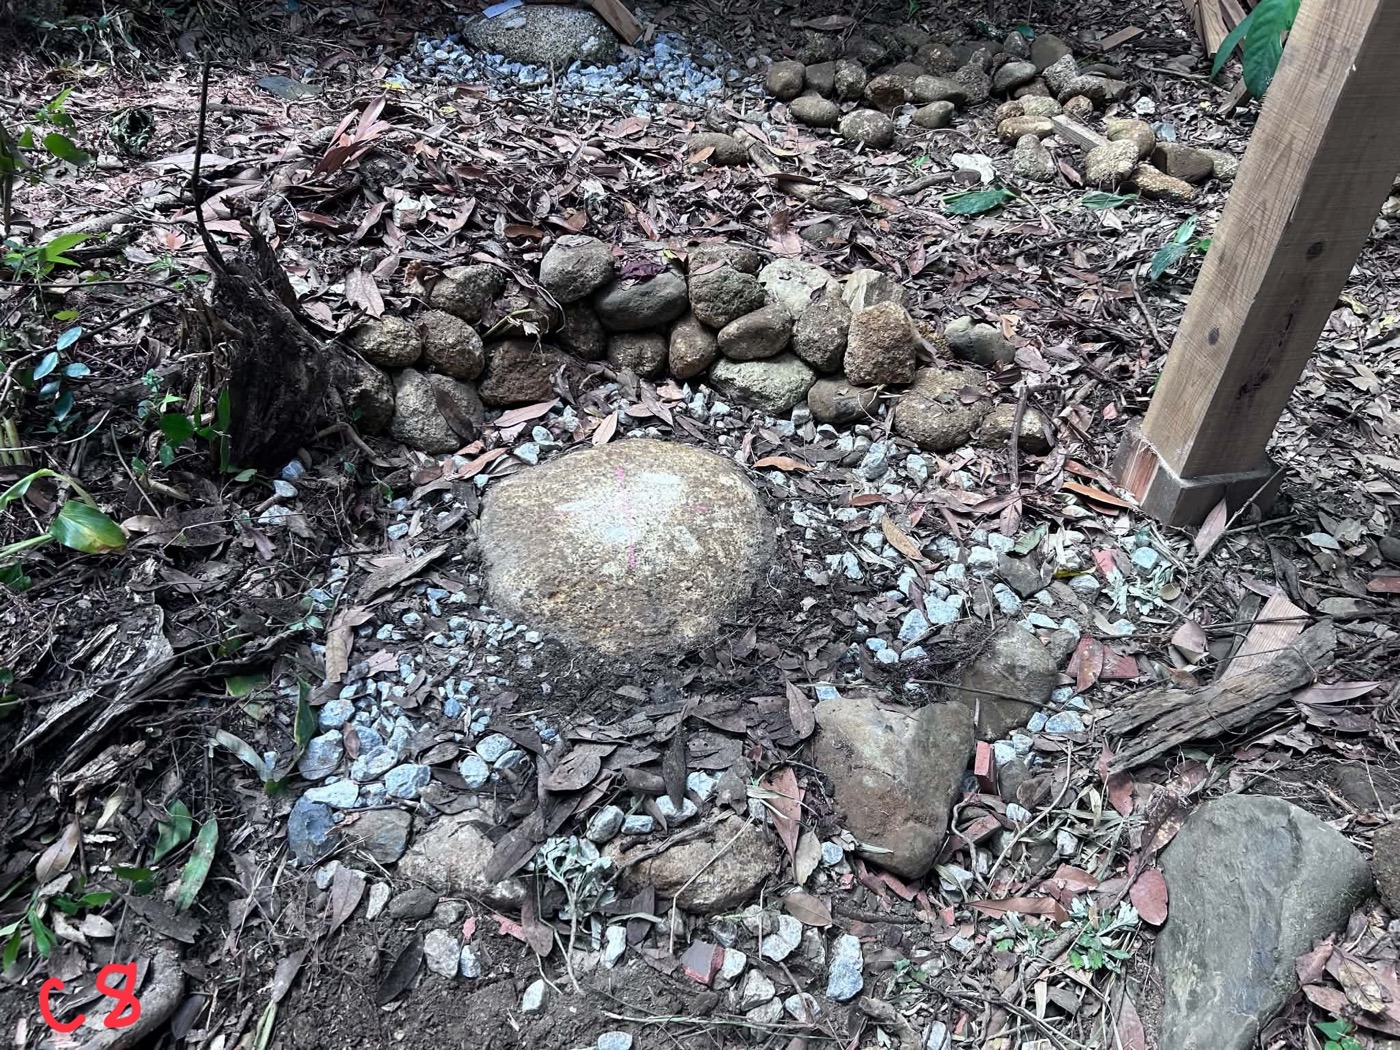
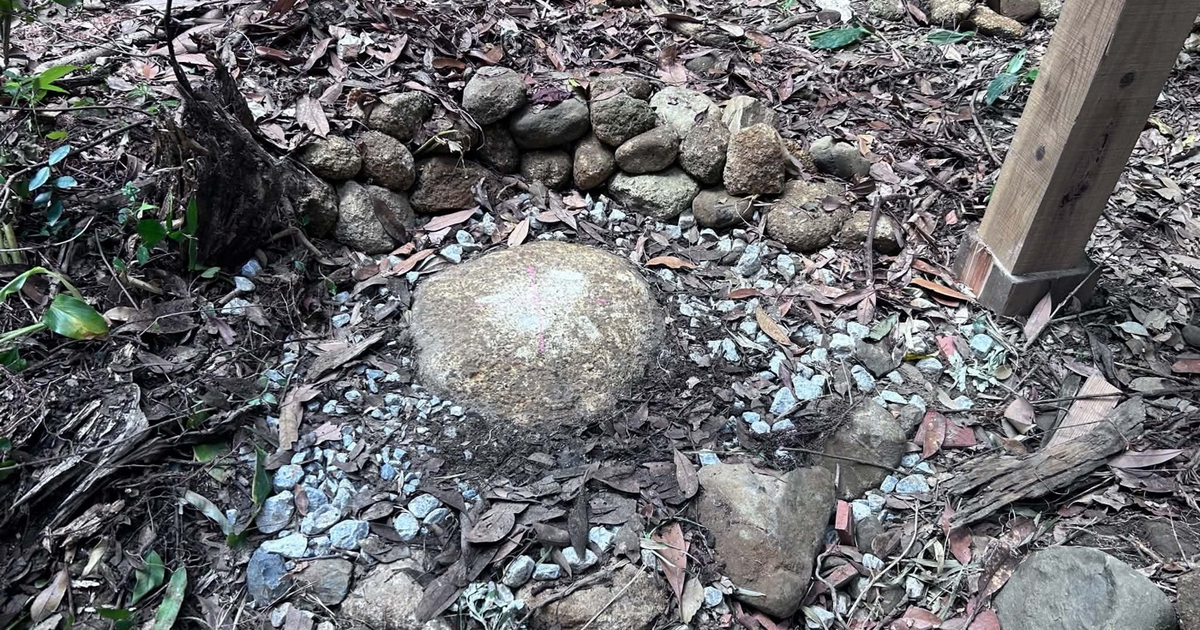
A natural stone’s surface is never flat on its own. On our sites, we dress the top of each foundation stone with a bush hammer, tapping the surface flat and checking with a spirit level again and again, until the pillar’s base can sit in full contact. The pillar is never fastened to the stone; it only rests there. Yet a pillar standing on a well-dressed stone top will not budge when pushed — and the fine texture the bush hammer leaves actually improves the friction between stone and wood.
And remember: one pillar is not a building. Ishibadate resists earthquakes as a system — pillars tied horizontally by ground beams and through-beams (nuki) that let the frame flex and dissipate energy. Raising pillars is not the end of the structure; connecting them is.
Tools and Materials
Shovels and a tamping post; tape measure, spirit level, water or laser level, string lines; a pry bar for adjusting stones, a bush hammer for dressing the stone tops; and for materials — broad-based natural stones, crushed stone, gravel, charcoal, cut grass. Nothing exotic. Which is exactly why it is tempting to believe the tools are all you need — but what this method actually demands is not tools. It is judgment, applied at every step.
Where Self-Builds Typically Fail
- Differential settlement — the most common and most serious failure. Miss the variation in ground firmness between pillar positions, and the building slowly distorts over years. By the time doors and windows stop closing, the fix requires lifting the entire structure.
- Accumulated level errors — a few millimeters per pit, per stone, per pillar adds up to structural distortion.
- Poorly dressed stone tops — if a stone’s top is not flat and level, stone and wood meet at points instead of a plane, concentrating load until pillar bases split or pillars sit unstable. Anyone can swing a bush hammer; judging when the surface is truly flat and true is where experience shows.
- Pillars without a structure — skip the horizontal tying and you lose the seismic behavior that makes ishibadate work. Standing pillars look finished; structurally they are not.
- Moisture and insects — block the underfloor airflow with a poor layout and you lose the dry crawl space that is this method’s greatest gift, inviting rot and termites.
- Unverified legality — a violation discovered after completion may be unfixable.
The Honest Part: What You Can Do Yourself, and Where It Gets Dangerous
If you have read this far and thought, “this is deeper than I expected” — that instinct is correct. Our honest position, after many sites: digging the pits, reading the soil, laying charcoal and crushed stone, tamping the beds — these stages are absolutely worth doing with your own hands. Learning how water and air move through your own land, through your own labor, is an education nothing else provides.
But reading the ground as a whole, deciding pillar placement, setting the stones and dressing their tops, planning the structure, and handling the legal side — carrying this territory alone on self-taught knowledge is a risk we cannot recommend. The cruel trait of this method is that failure does not show up immediately. Everything looks fine the day the pillars go up; the distortion arrives one or three years later, when it can no longer be corrected easily.
So we suggest a third path — neither “do everything alone” nor “give up the dream.” Do the groundwork with your own hands, and bring in professionals for the ground assessment, the structural planning, and the code strategy. We support projects in exactly this accompanying role, including workshop-style builds where you learn while building.
Frequently Asked Questions
Q. Can I build an ishibadate foundation myself?
Parts of it, yes. Digging the foundation pits, reading the soil, laying charcoal and crushed stone, and tamping the beds are well worth doing with your own hands. But assessing the ground as a whole, setting the stones and dressing their tops, structural planning, and code compliance are experience-dependent territory — carrying those alone on self-taught knowledge is a risk professionals consistently advise against.
Q. What is the most common failure in self-built ishibadate projects?
Differential settlement — when pillars sink at different rates because variations in ground firmness between pillar positions went unnoticed. Everything looks fine at first; the distortion appears one to three years later, when doors and windows stop closing, and fixing it requires lifting the entire building.
Q. Why is charcoal placed under the foundation stones?
Charcoal is porous: it keeps air pathways open in the soil, buffers moisture, and houses fungal networks. It turns the ground beneath each stone into a breathing, draining layer rather than a sealed bottom, which stabilizes the ground over the long term. Crushed stone and gravel are then added in tamped layers above it.
Q. How are the foundation stone tops made flat?
With a bush hammer — a masonry hammer with a textured face used to dress stone. The top of each foundation stone is tapped flat, checked repeatedly with a spirit level, and brought to matching height with the other stones, creating a plane the pillar base can rest on in full contact. A pillar on a well-dressed stone will not budge when pushed even though nothing fastens it, but judging when a surface is truly flat and level takes an experienced eye.
Q. Do I need a permit for a small ishibadate hut?
Quite possibly. In Japan, even small buildings inside city planning areas generally require building confirmation, and permitted ishibadate structures need limit strength calculation. Outside Japan, most codes require anchored foundations and offer alternative-means pathways instead. In every case, confirm with your local building authority before breaking ground — retroactive legalization is extremely difficult.
Summary
- Ishibadate suits self-building because it needs no concrete and only natural materials — but the trade is that the builder must read the ground, since no slab will hide its unevenness.
- The sequence: read the site’s water on a rainy day → excavate and read each pit → charcoal and tamped crushed-stone groundwork → set and level the stones → dress the stone tops → raise the pillars and tie them into a structure.
- Typical failures — differential settlement, accumulated level error, poorly dressed stone tops, untied pillars, blocked airflow, legal violations — share one trait: they surface years later, when correction means major work.
- Dig, read, tamp: do that yourself. Ground assessment, structure, and code: do that with a professional beside you. That combination keeps both the dream and the building standing.
Thinking seriously about an ishibadate build? Explore the structural principles in our other articles on traditional Japanese construction, or study the method systematically through the EKAM Online Course — and feel free to contact us about your site before you break ground.